Camper Reno
You Don't Need to Gut Your Camper to Give It New Life
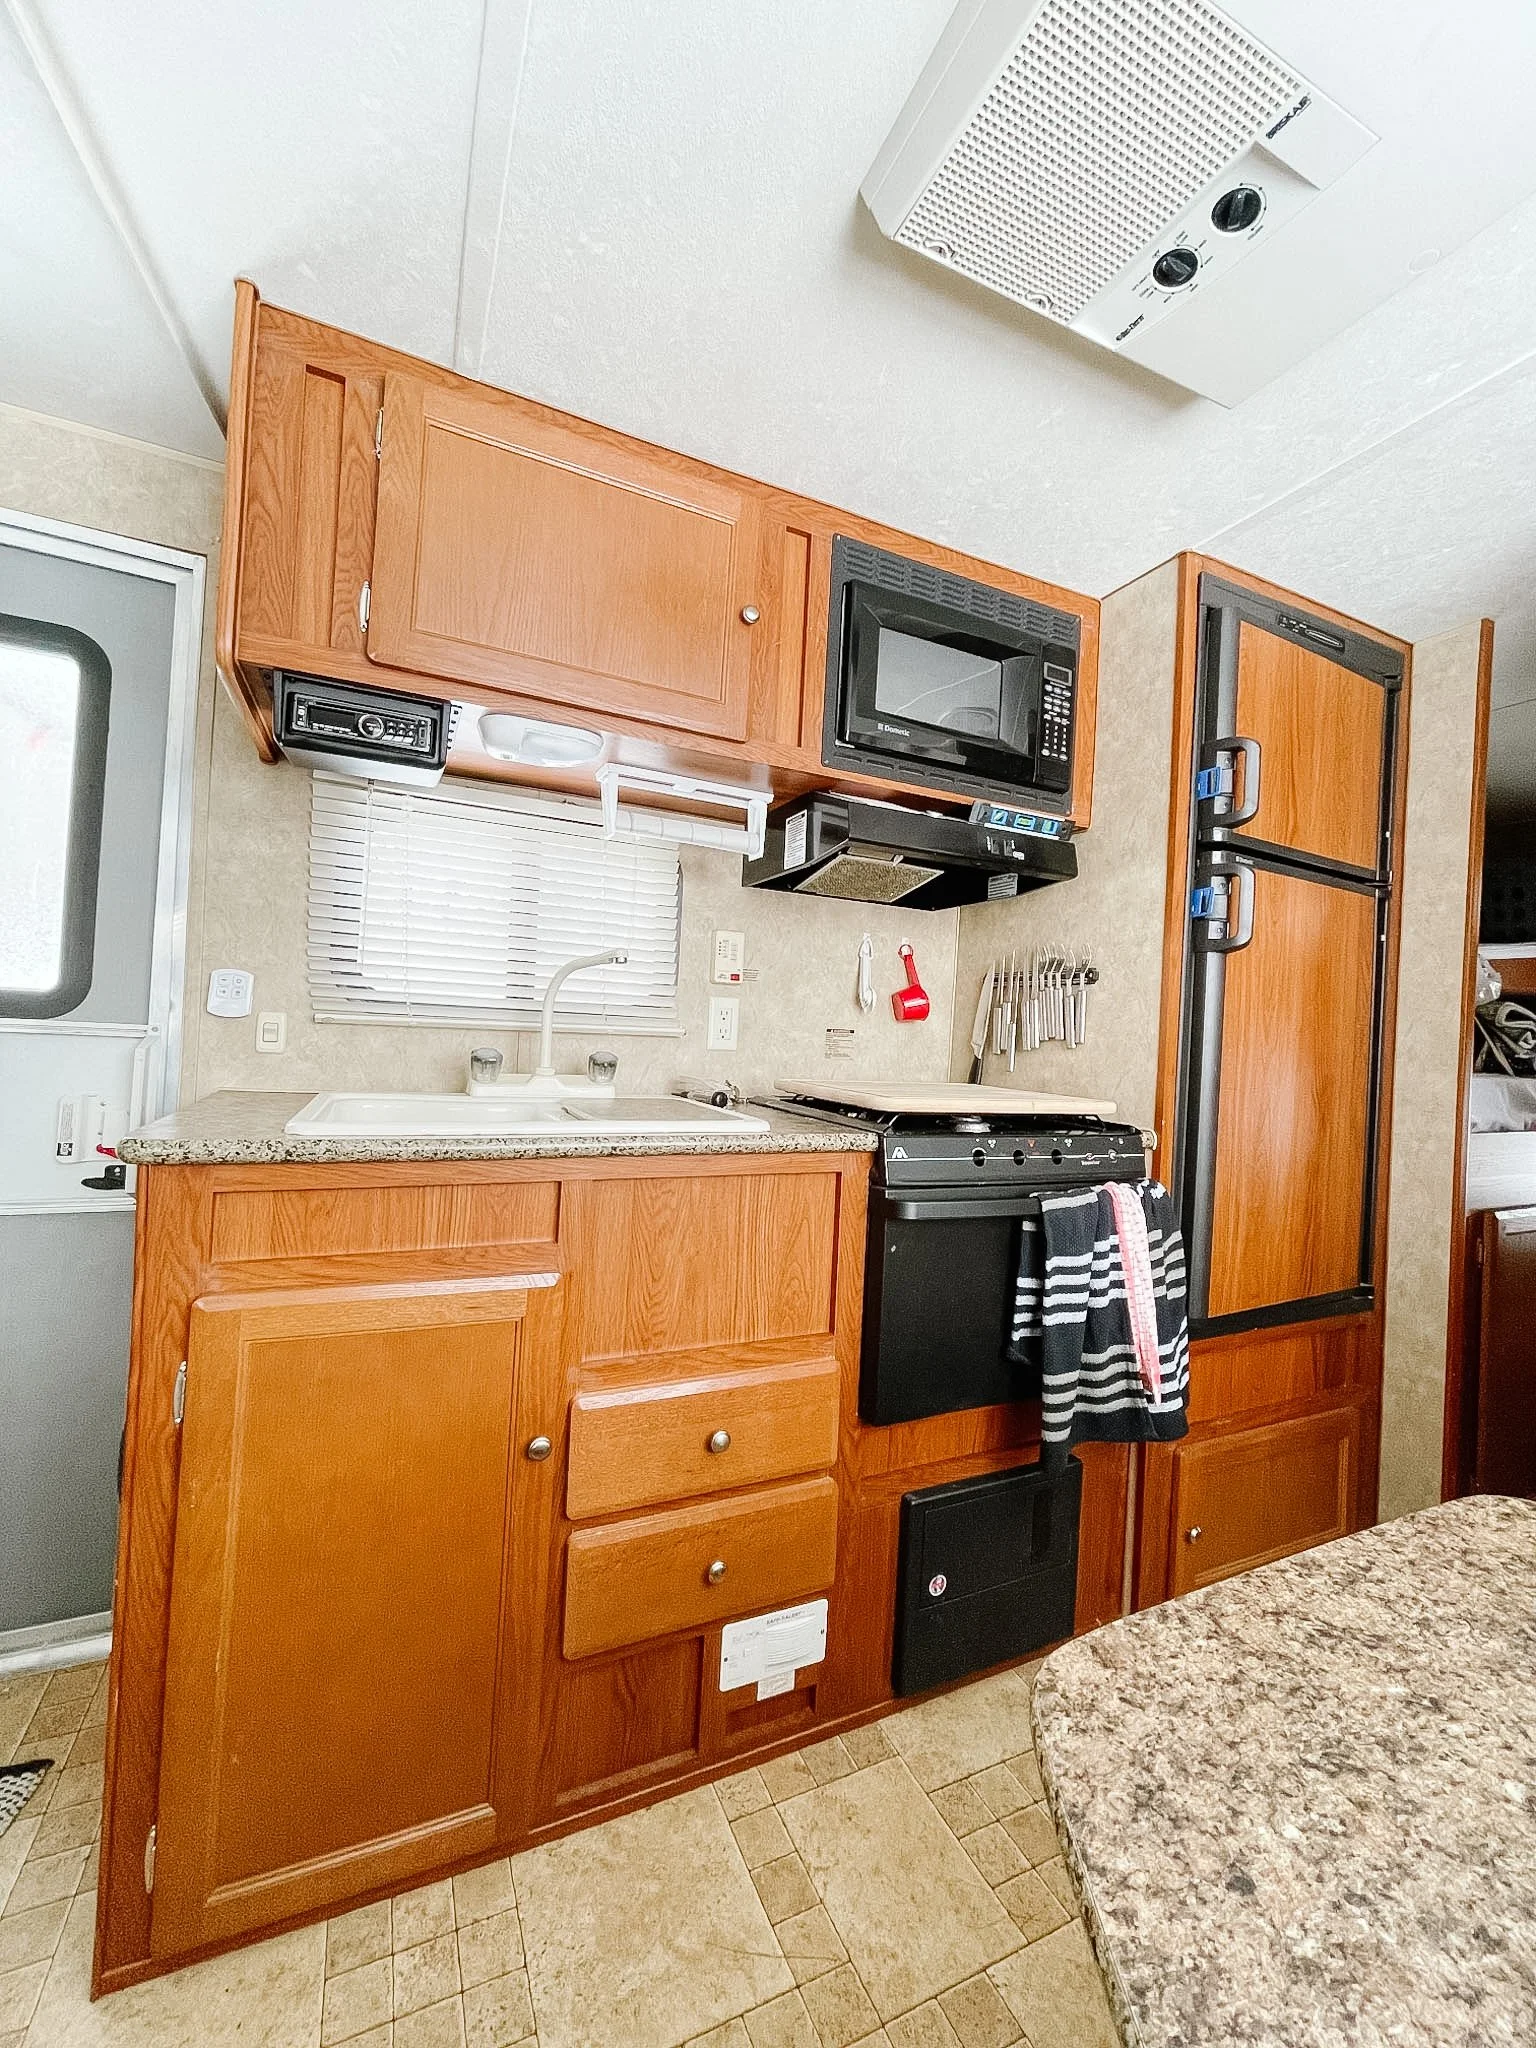
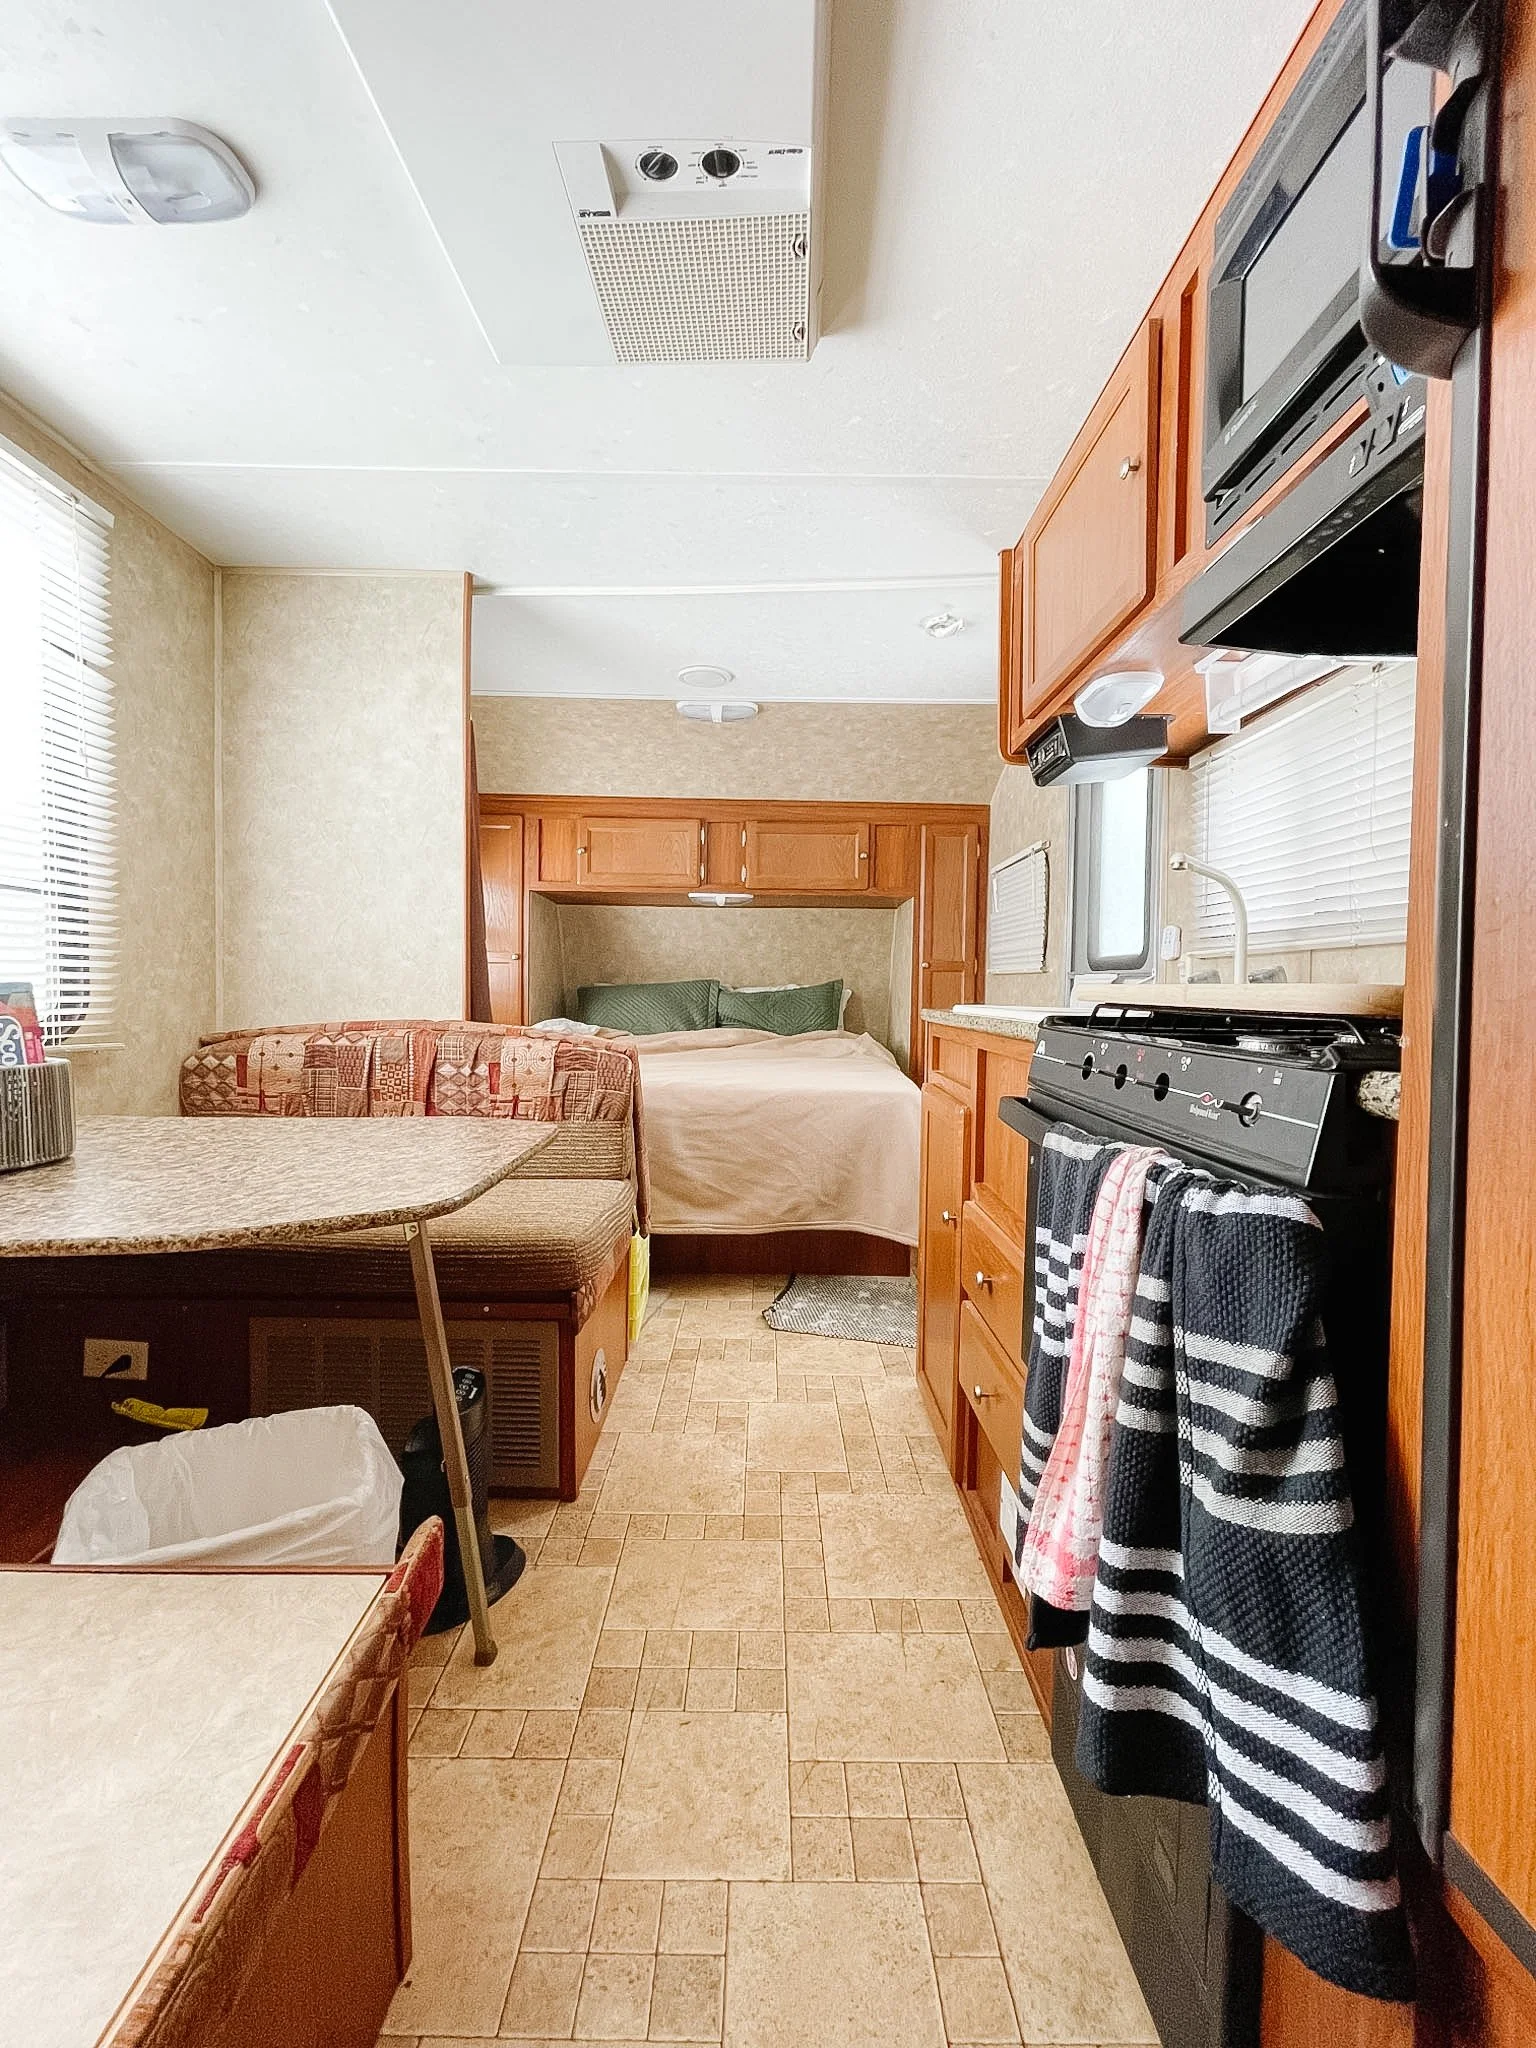
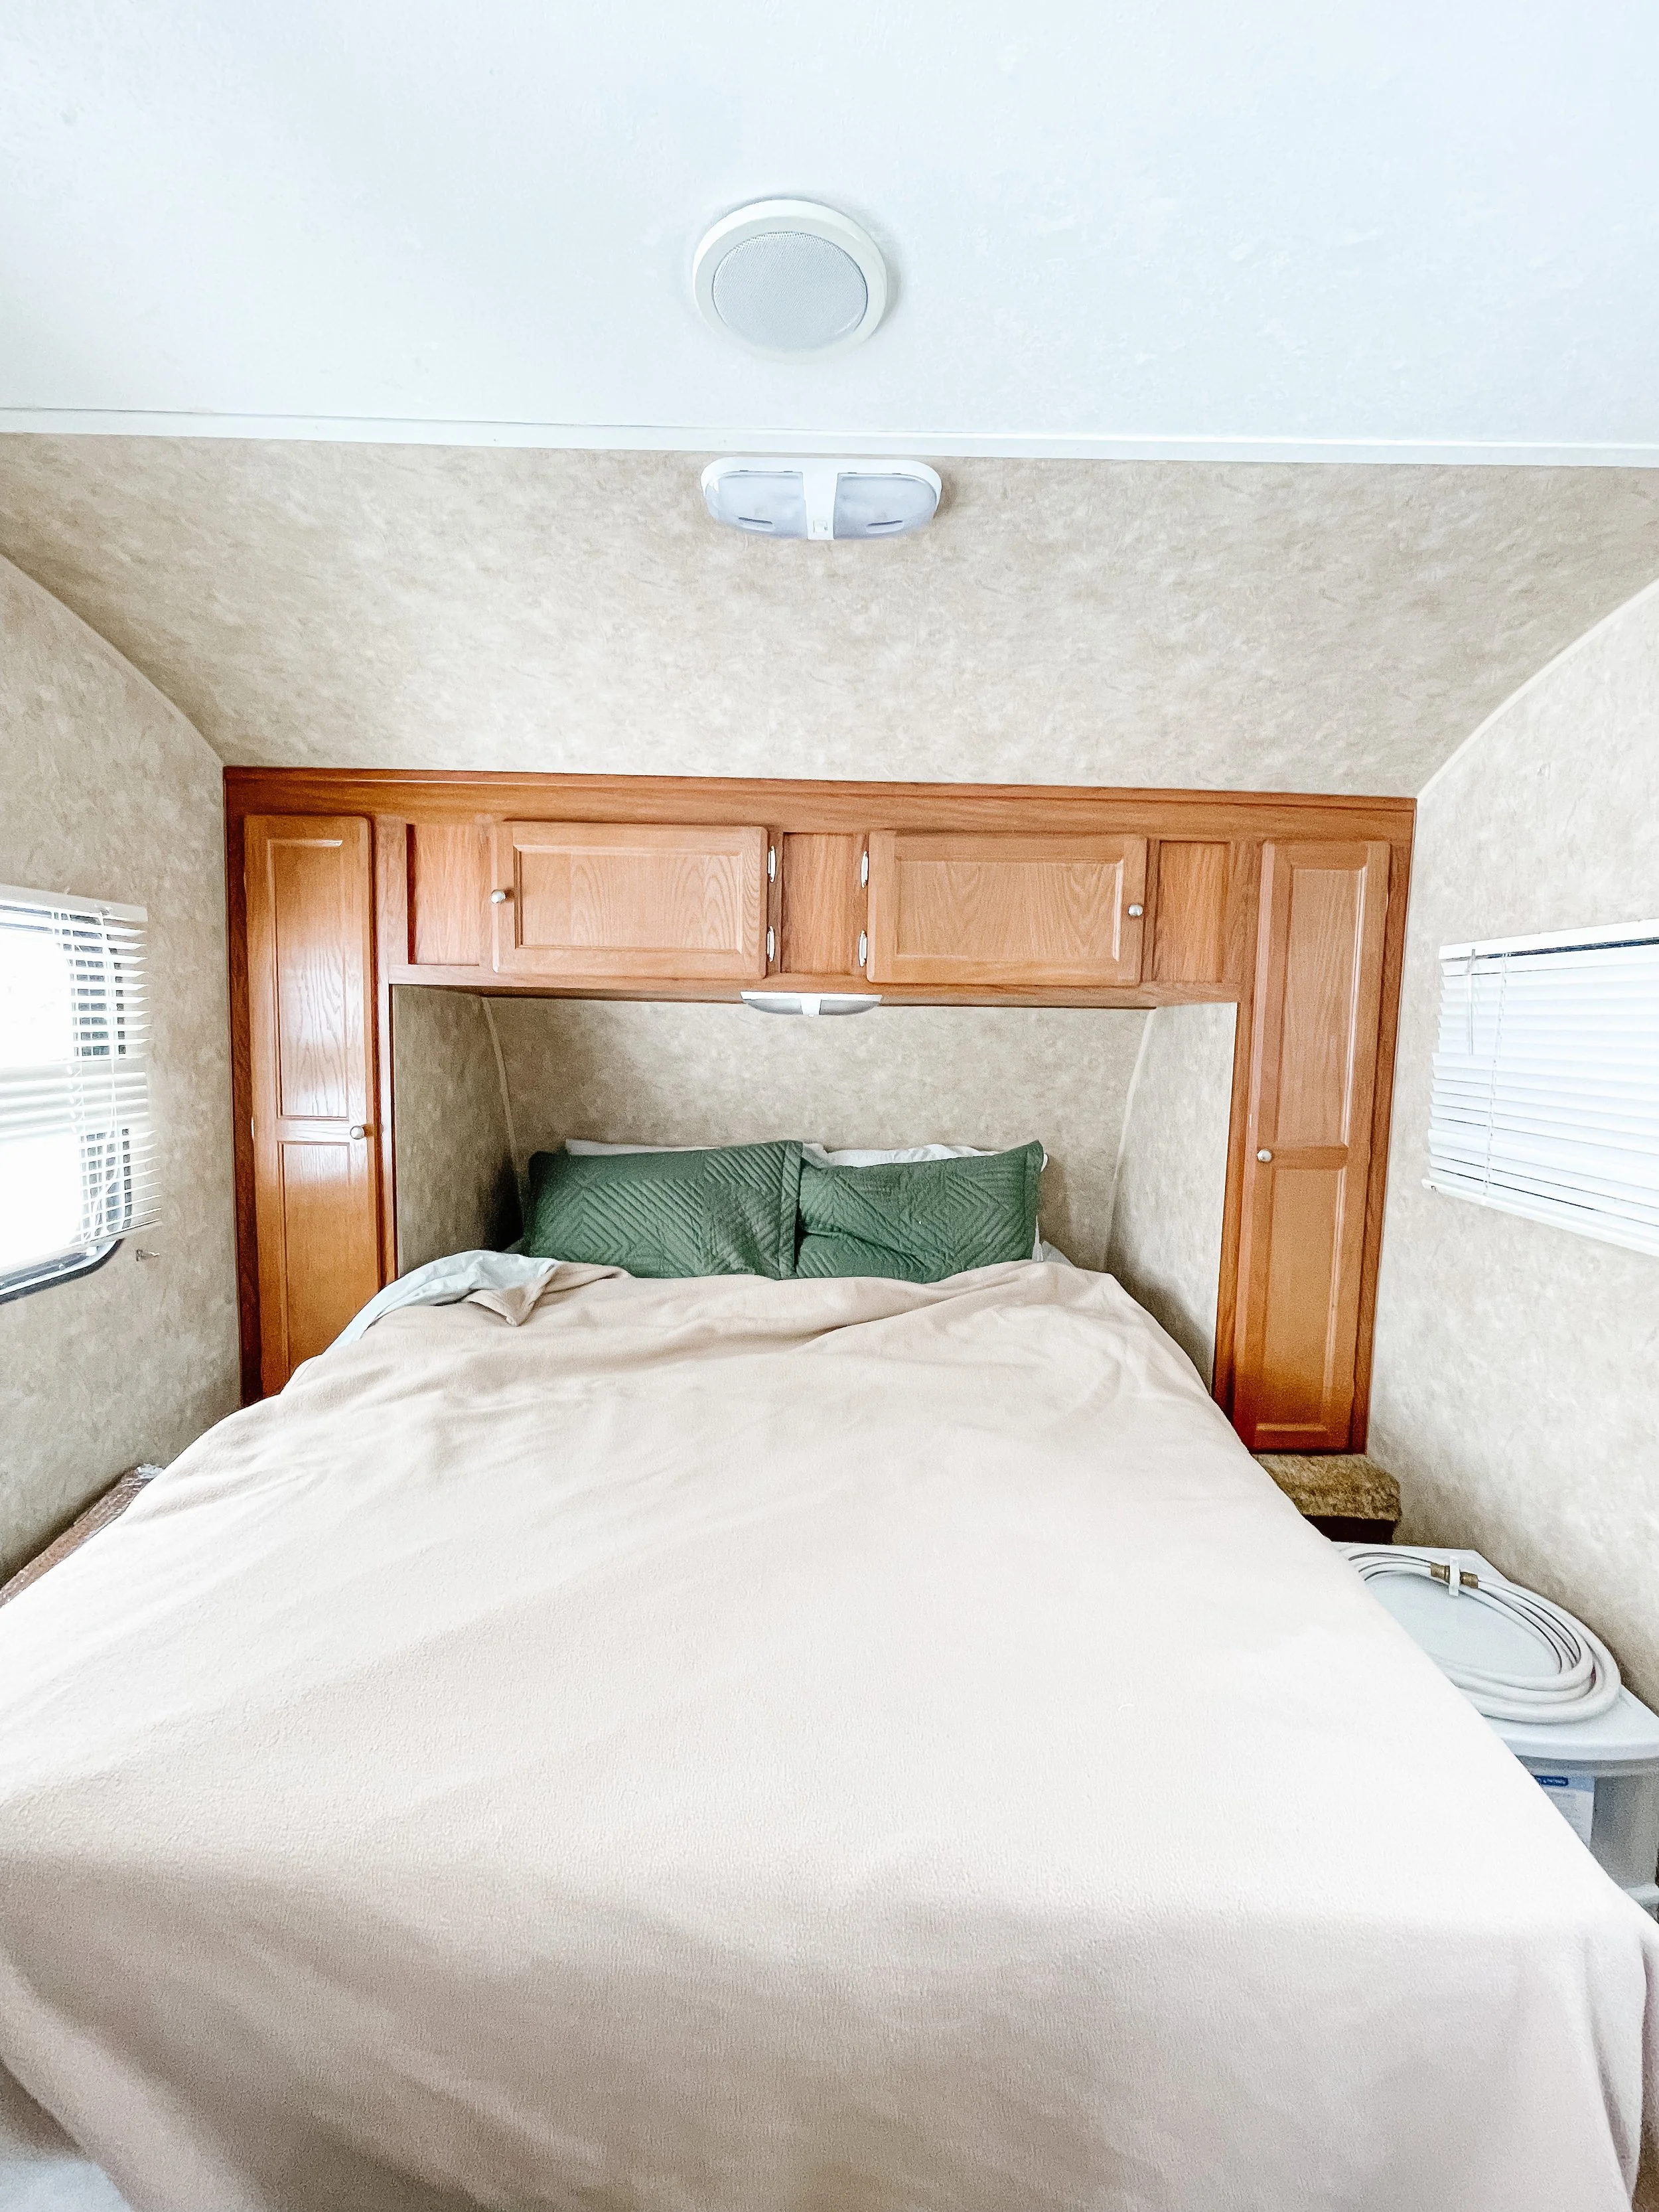
If you've ever looked at your camper and thought, "I'd love to update it, but I don't have the time, budget, or desire to completely gut it," you're not alone.
When we renovated our camper, I wanted it to feel more like a cozy retreat and less like a standard RV. But I also didn't want to spend thousands of dollars replacing every surface or tackling a full demolition project.
The good news? You don't need to.
With a few strategic updates, some paint, and thoughtfully chosen accessories, you can completely transform the look and function of your camper without ripping everything out.
Today I'm sharing some of my favorite camper makeover tips, along with the products I used (or similar alternatives) so you can create your own cozy home-away-from-home.
Start With Paint
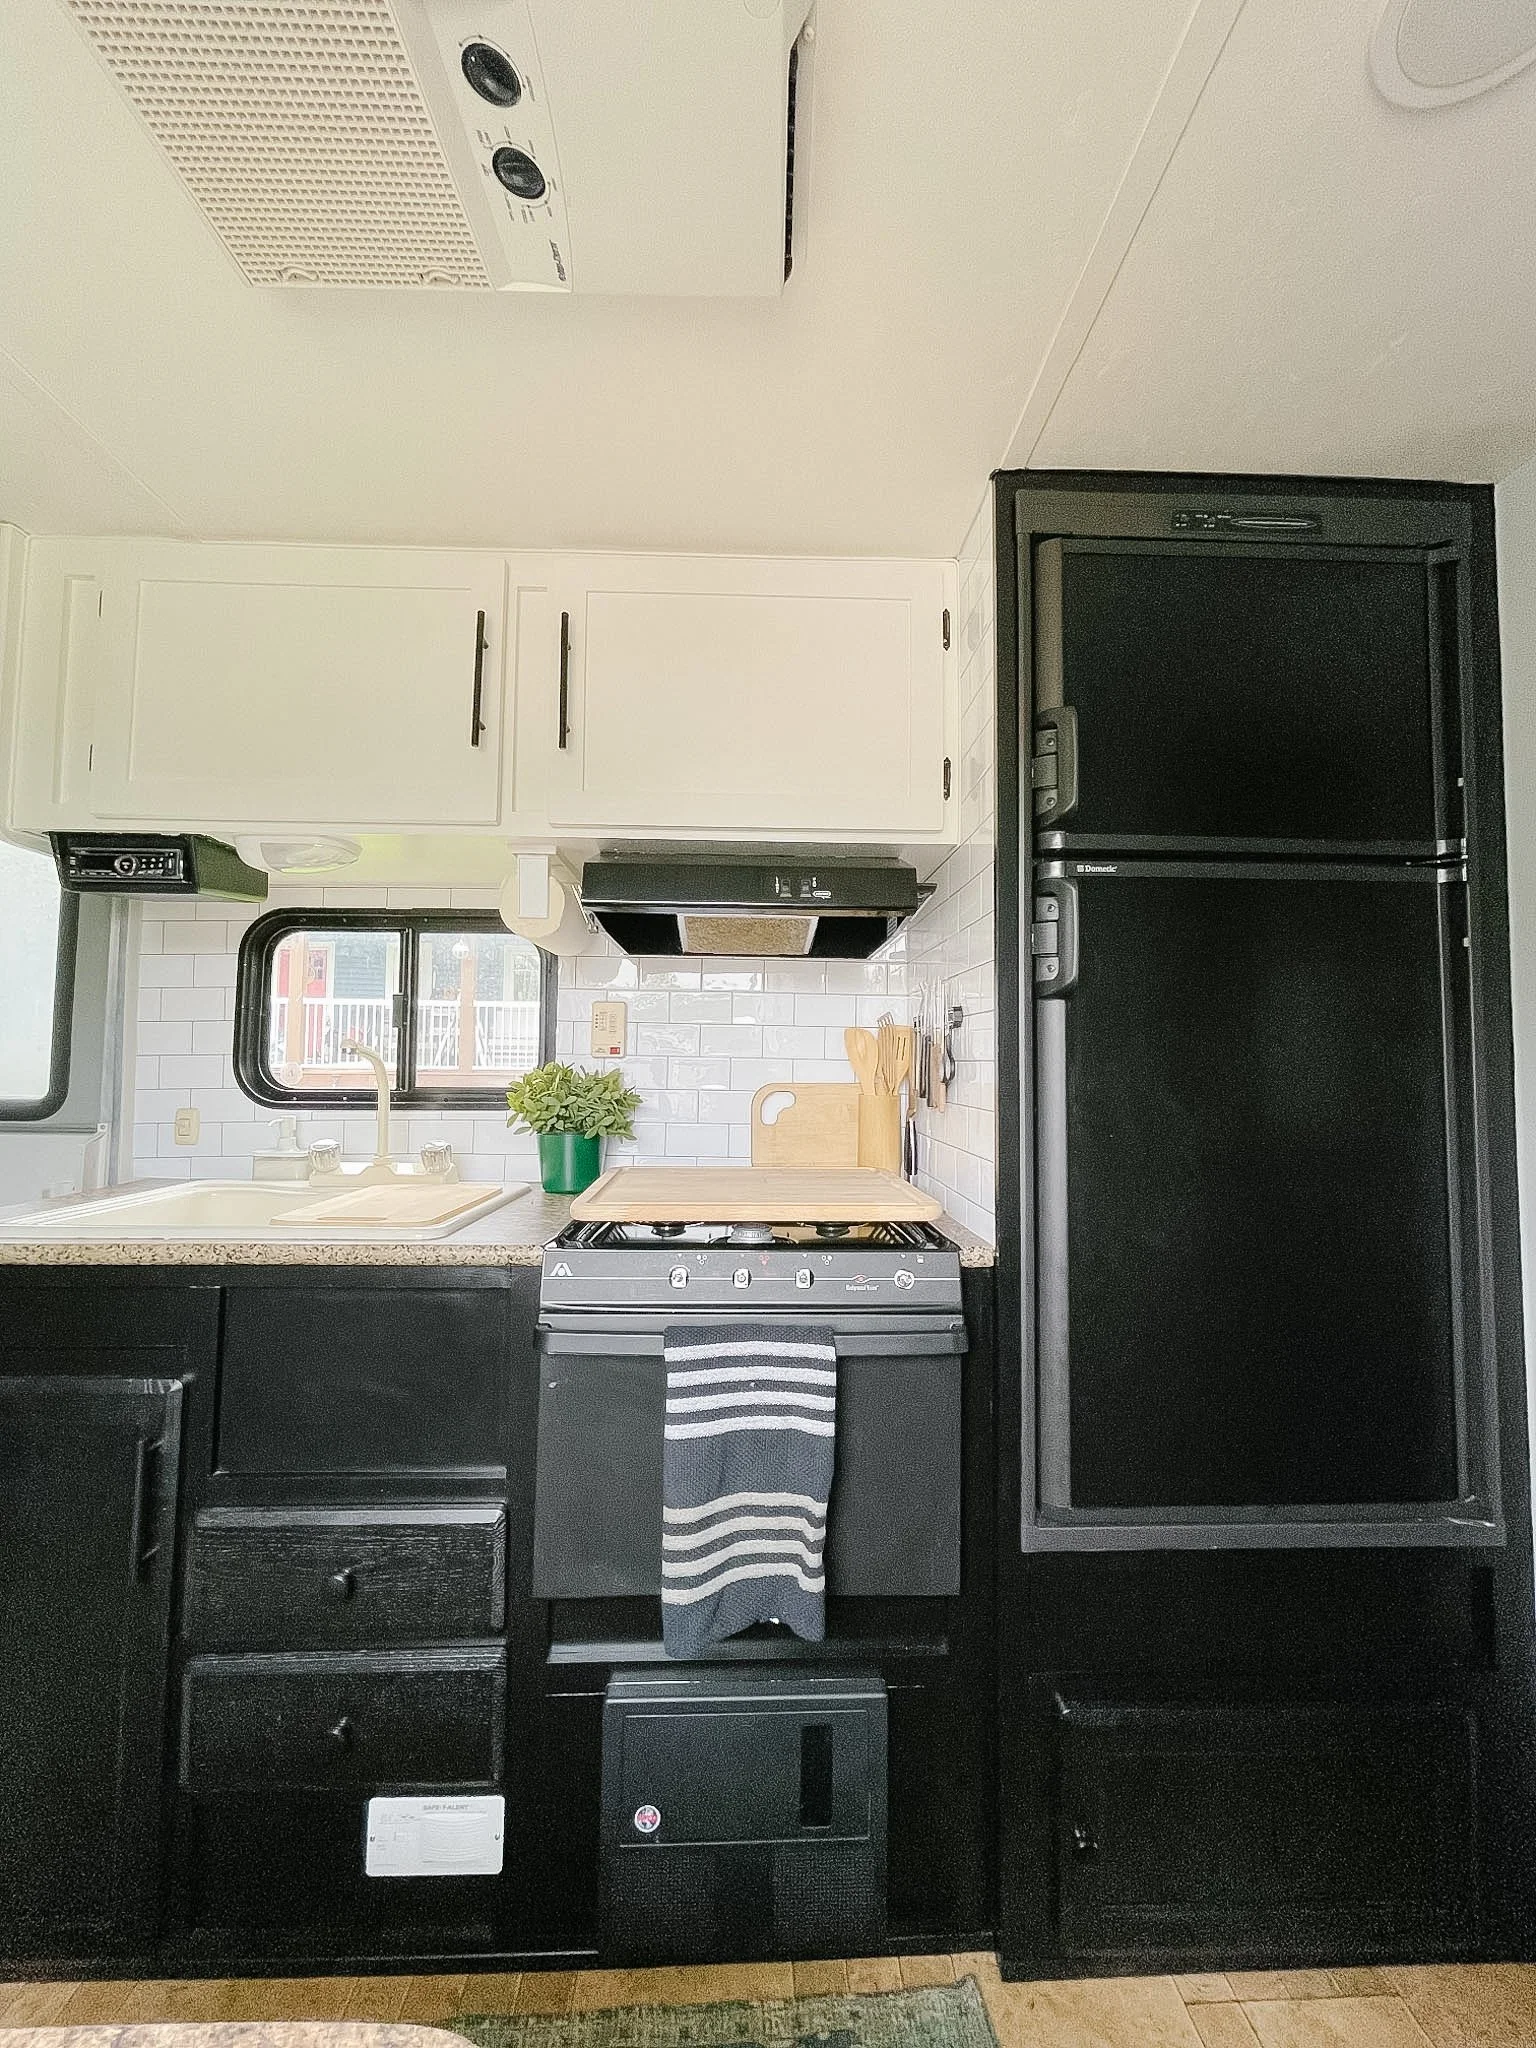
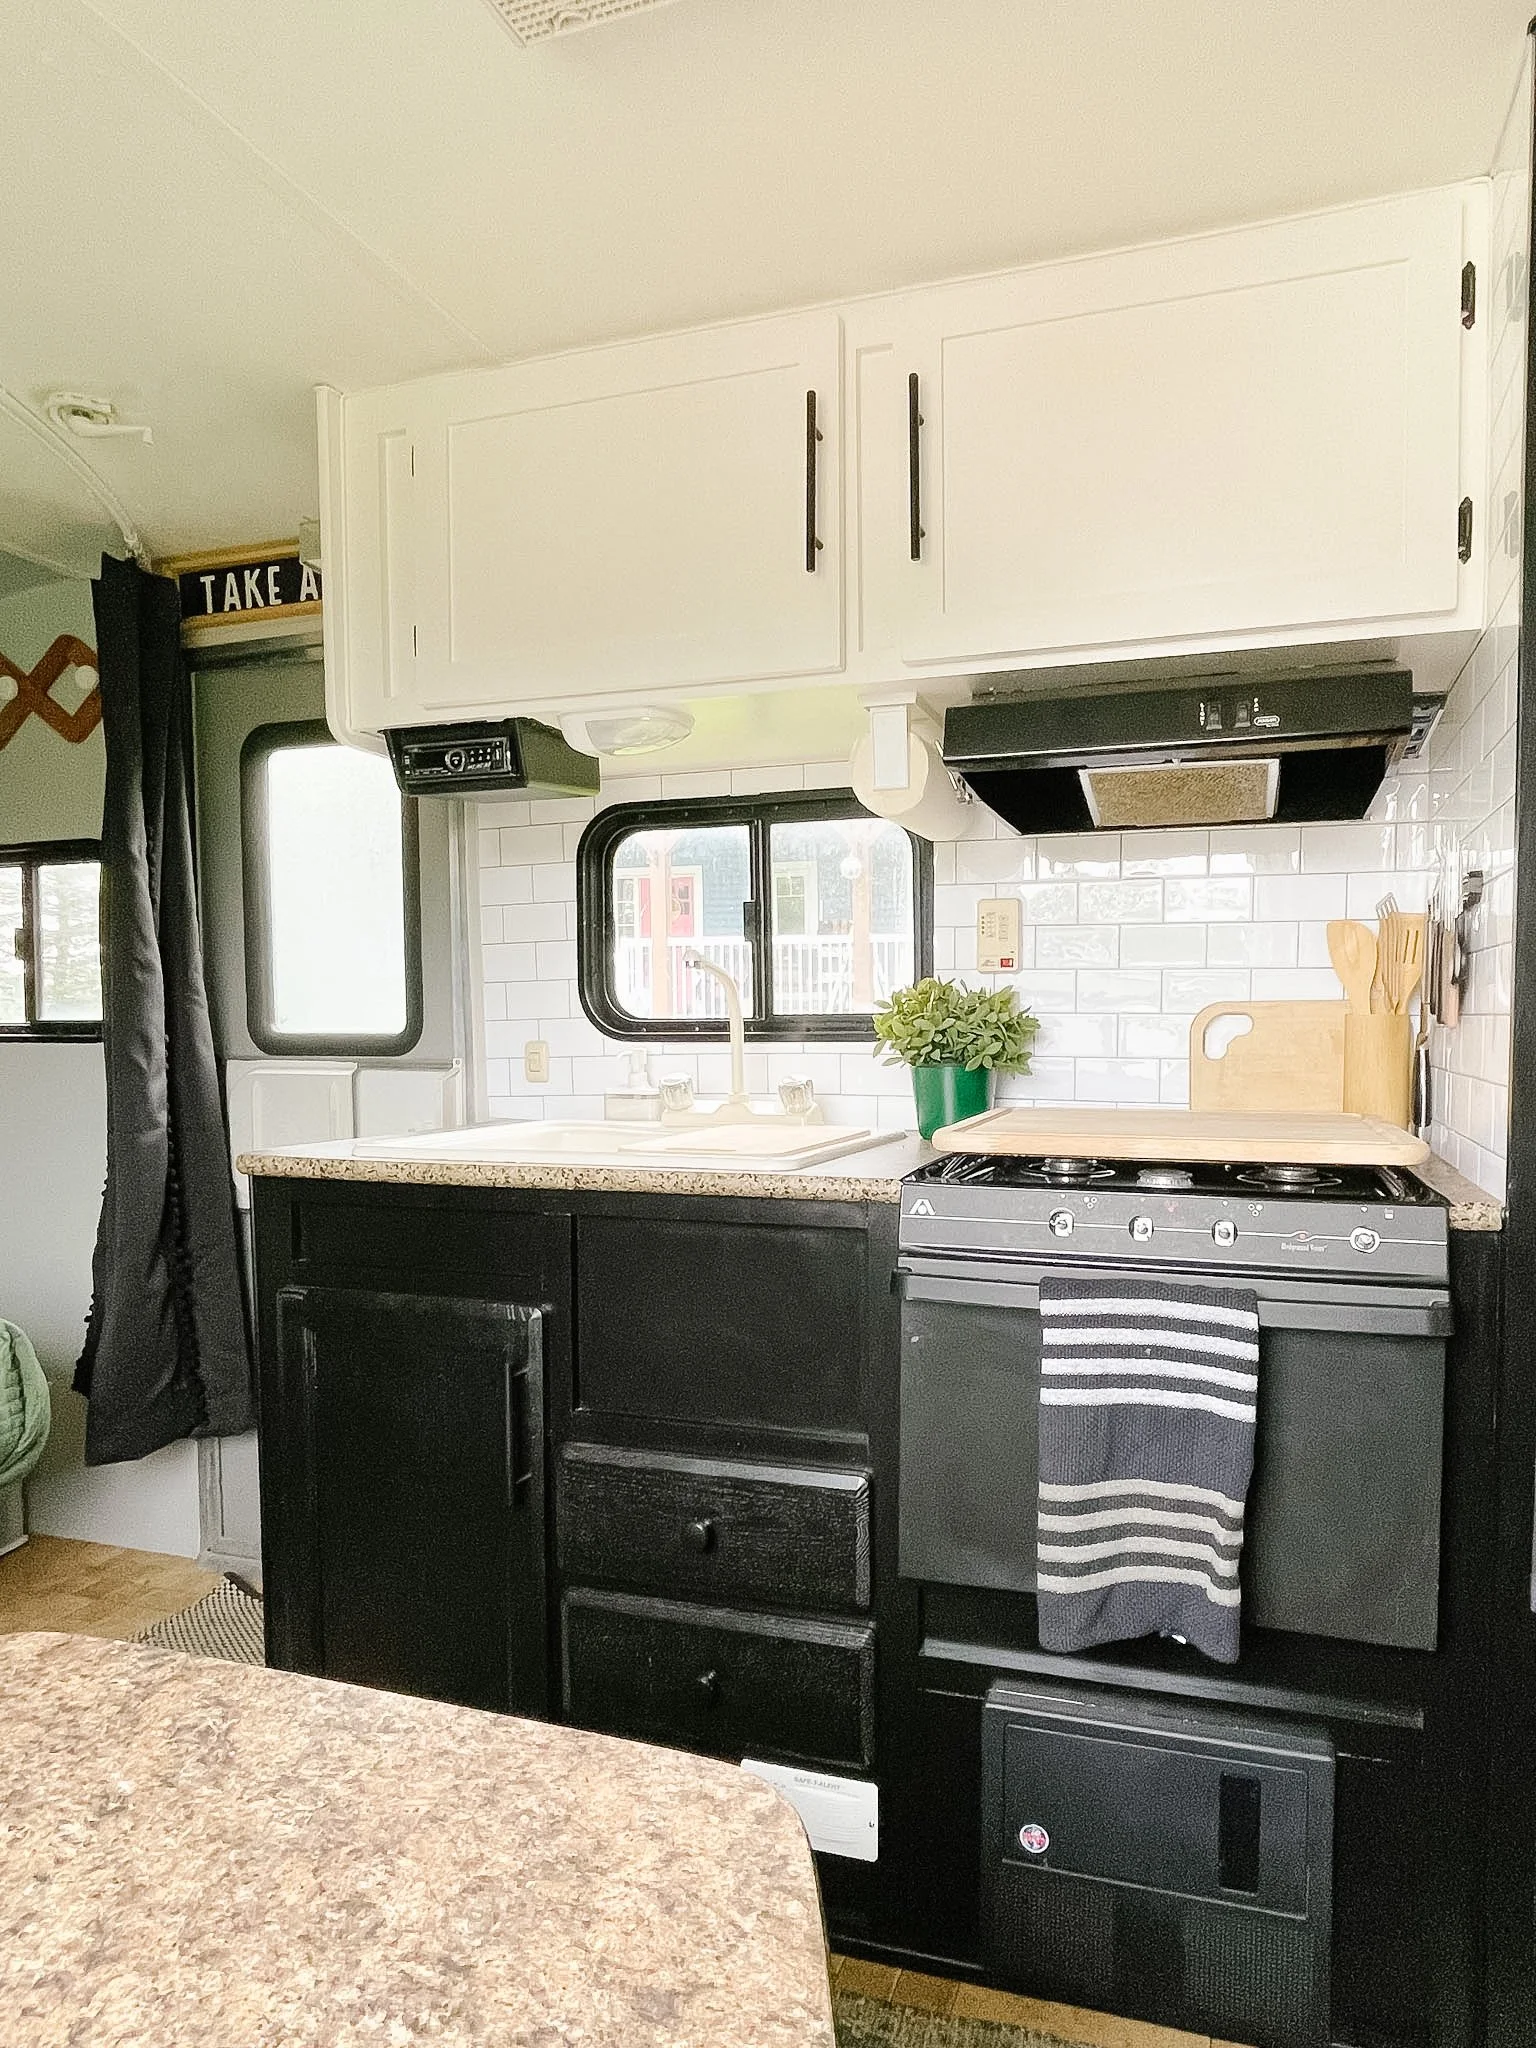
If there is one thing that gives you the biggest impact for the smallest investment, it's paint.
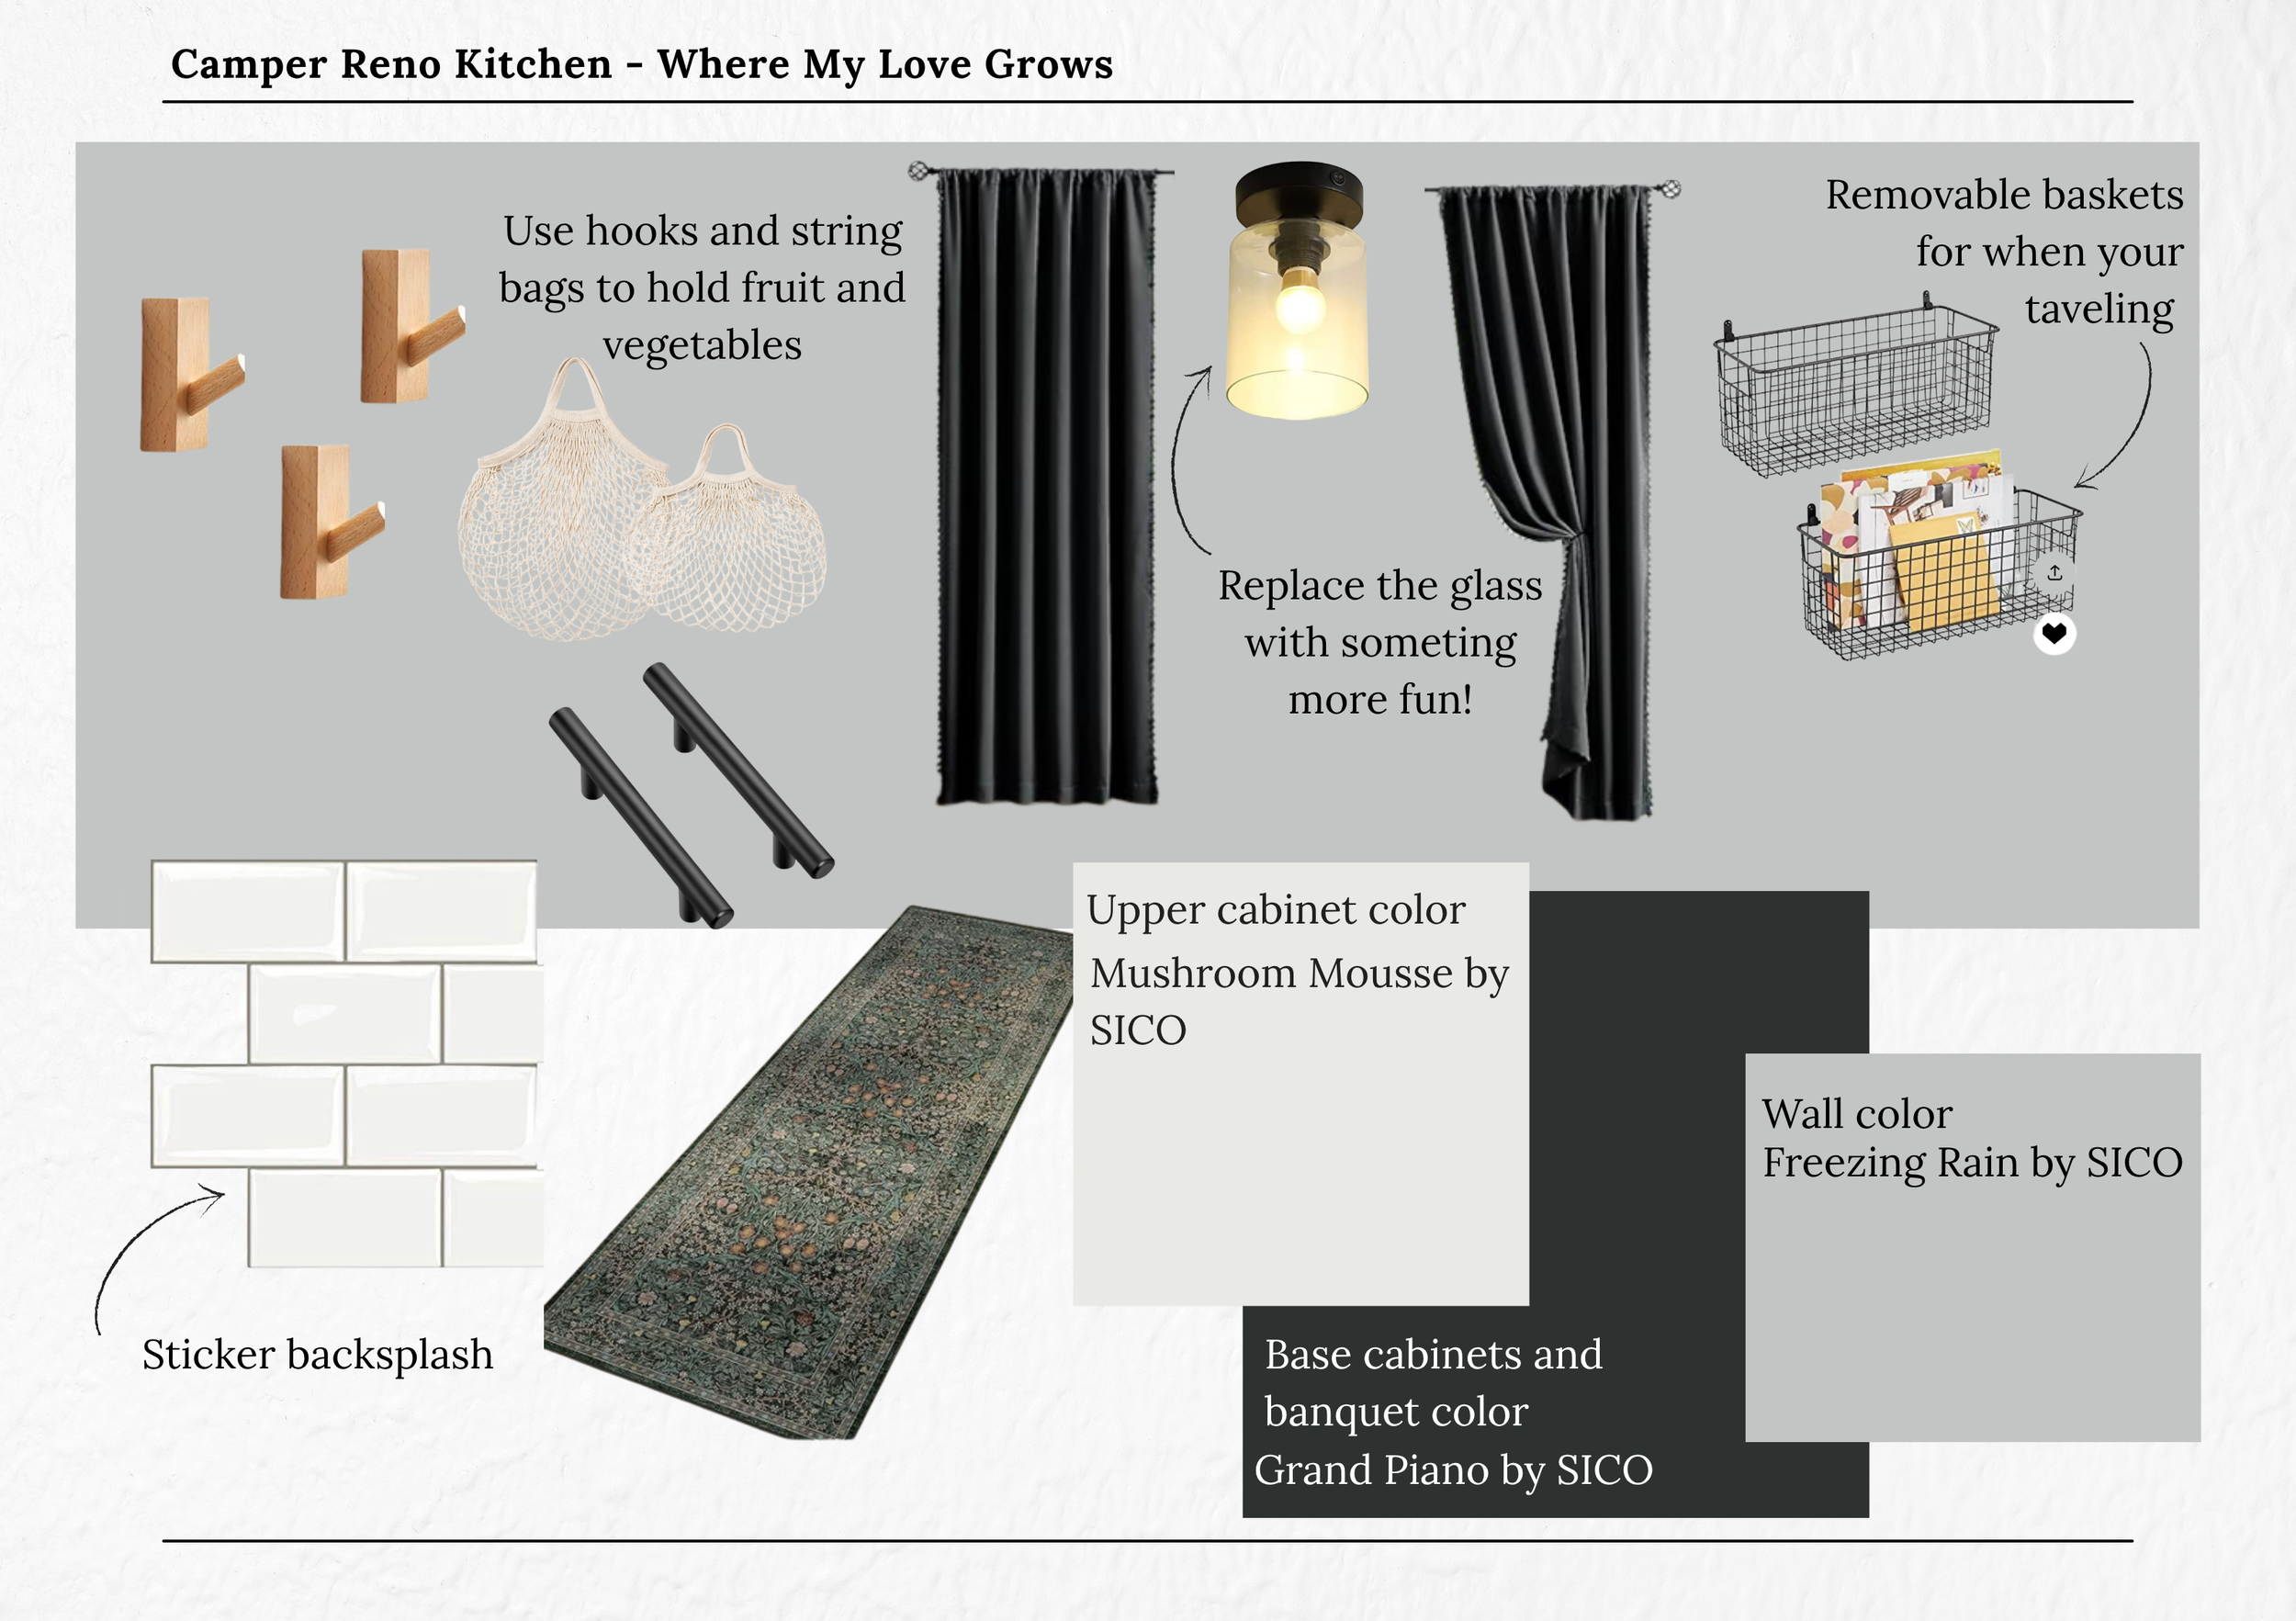
For our camper, I chose a rich, moody palette that made the space feel custom and intentional rather than builder-grade.
Colours Used
Walls: Freezing Rain by SICO
Base Cabinets & Banquette: Grand Piano by SICO
Upper Cabinets: Mushroom Mousse by SICO
The contrast between the light walls and dark cabinetry added depth while still keeping the space feeling bright.
Tip: Use a high-quality primer before painting RV cabinetry to improve durability and help the finish stand up to travel. Check out my blog 5 Tips for Painting your Camper Walls

Update Hardware for an Instant Upgrade
One of the easiest changes you can make is swapping out cabinet hardware.
We replaced the original hardware with simple matte black pulls, instantly giving the cabinetry a more modern look.
It's a small detail, but it makes a huge difference.
The other big impact I did in the kitchen was take the microware out that was just storing our bread and make it a useful pantry. I found two matching cabinet doors in the right size and painted them so once installed you would never know. Now we have more room for food!
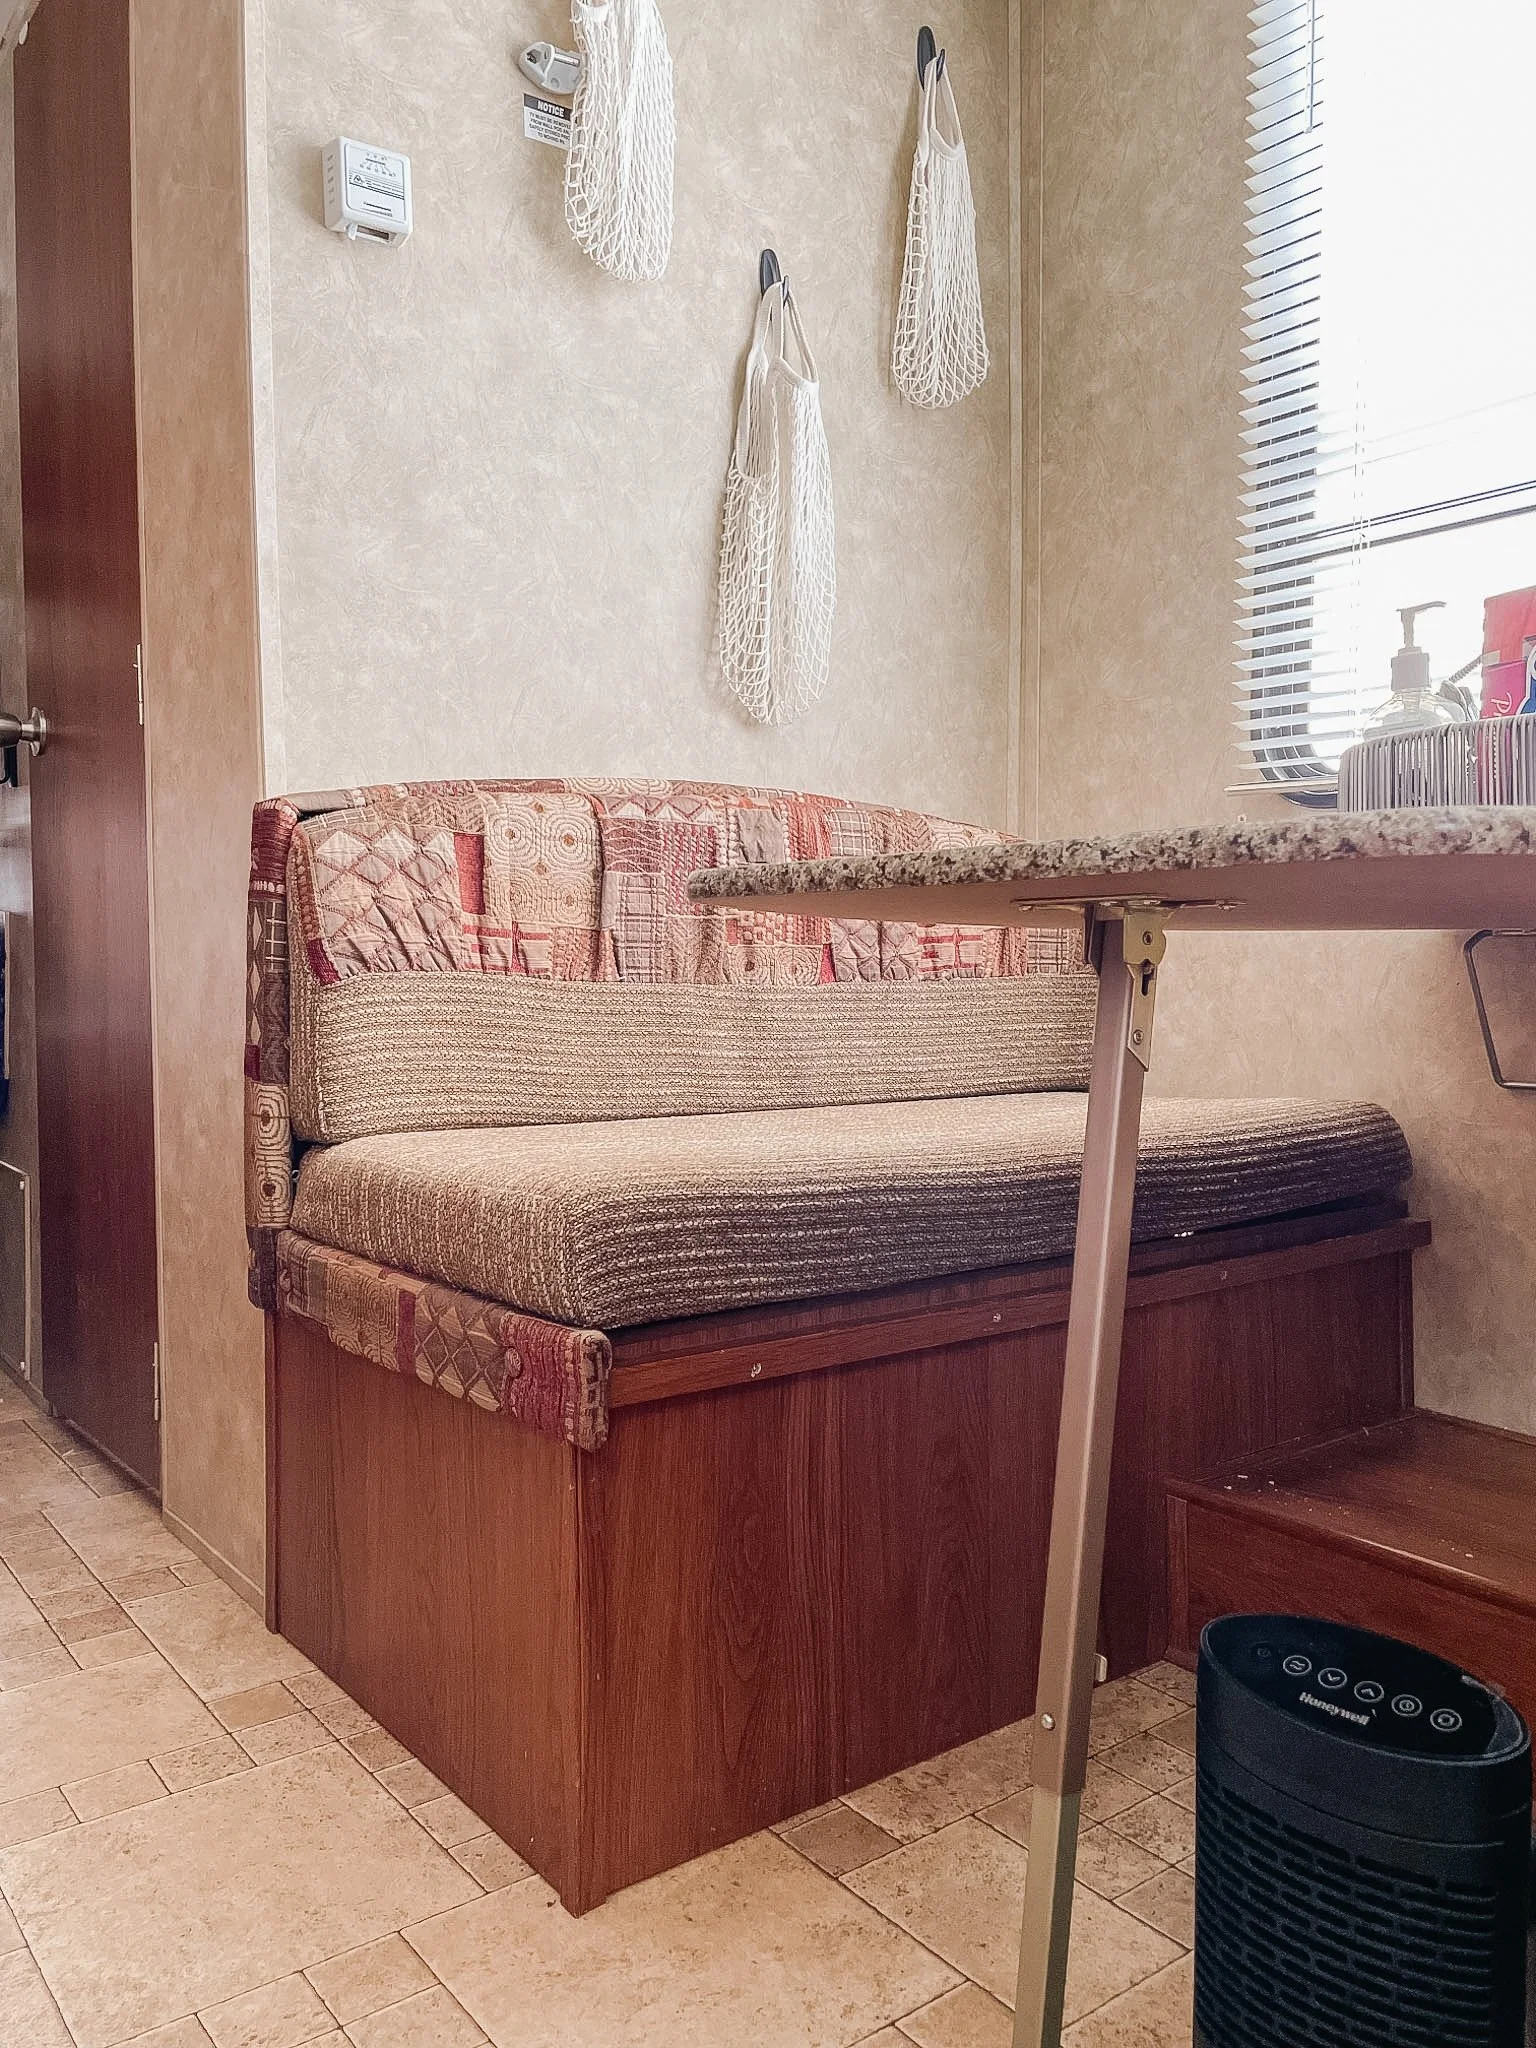
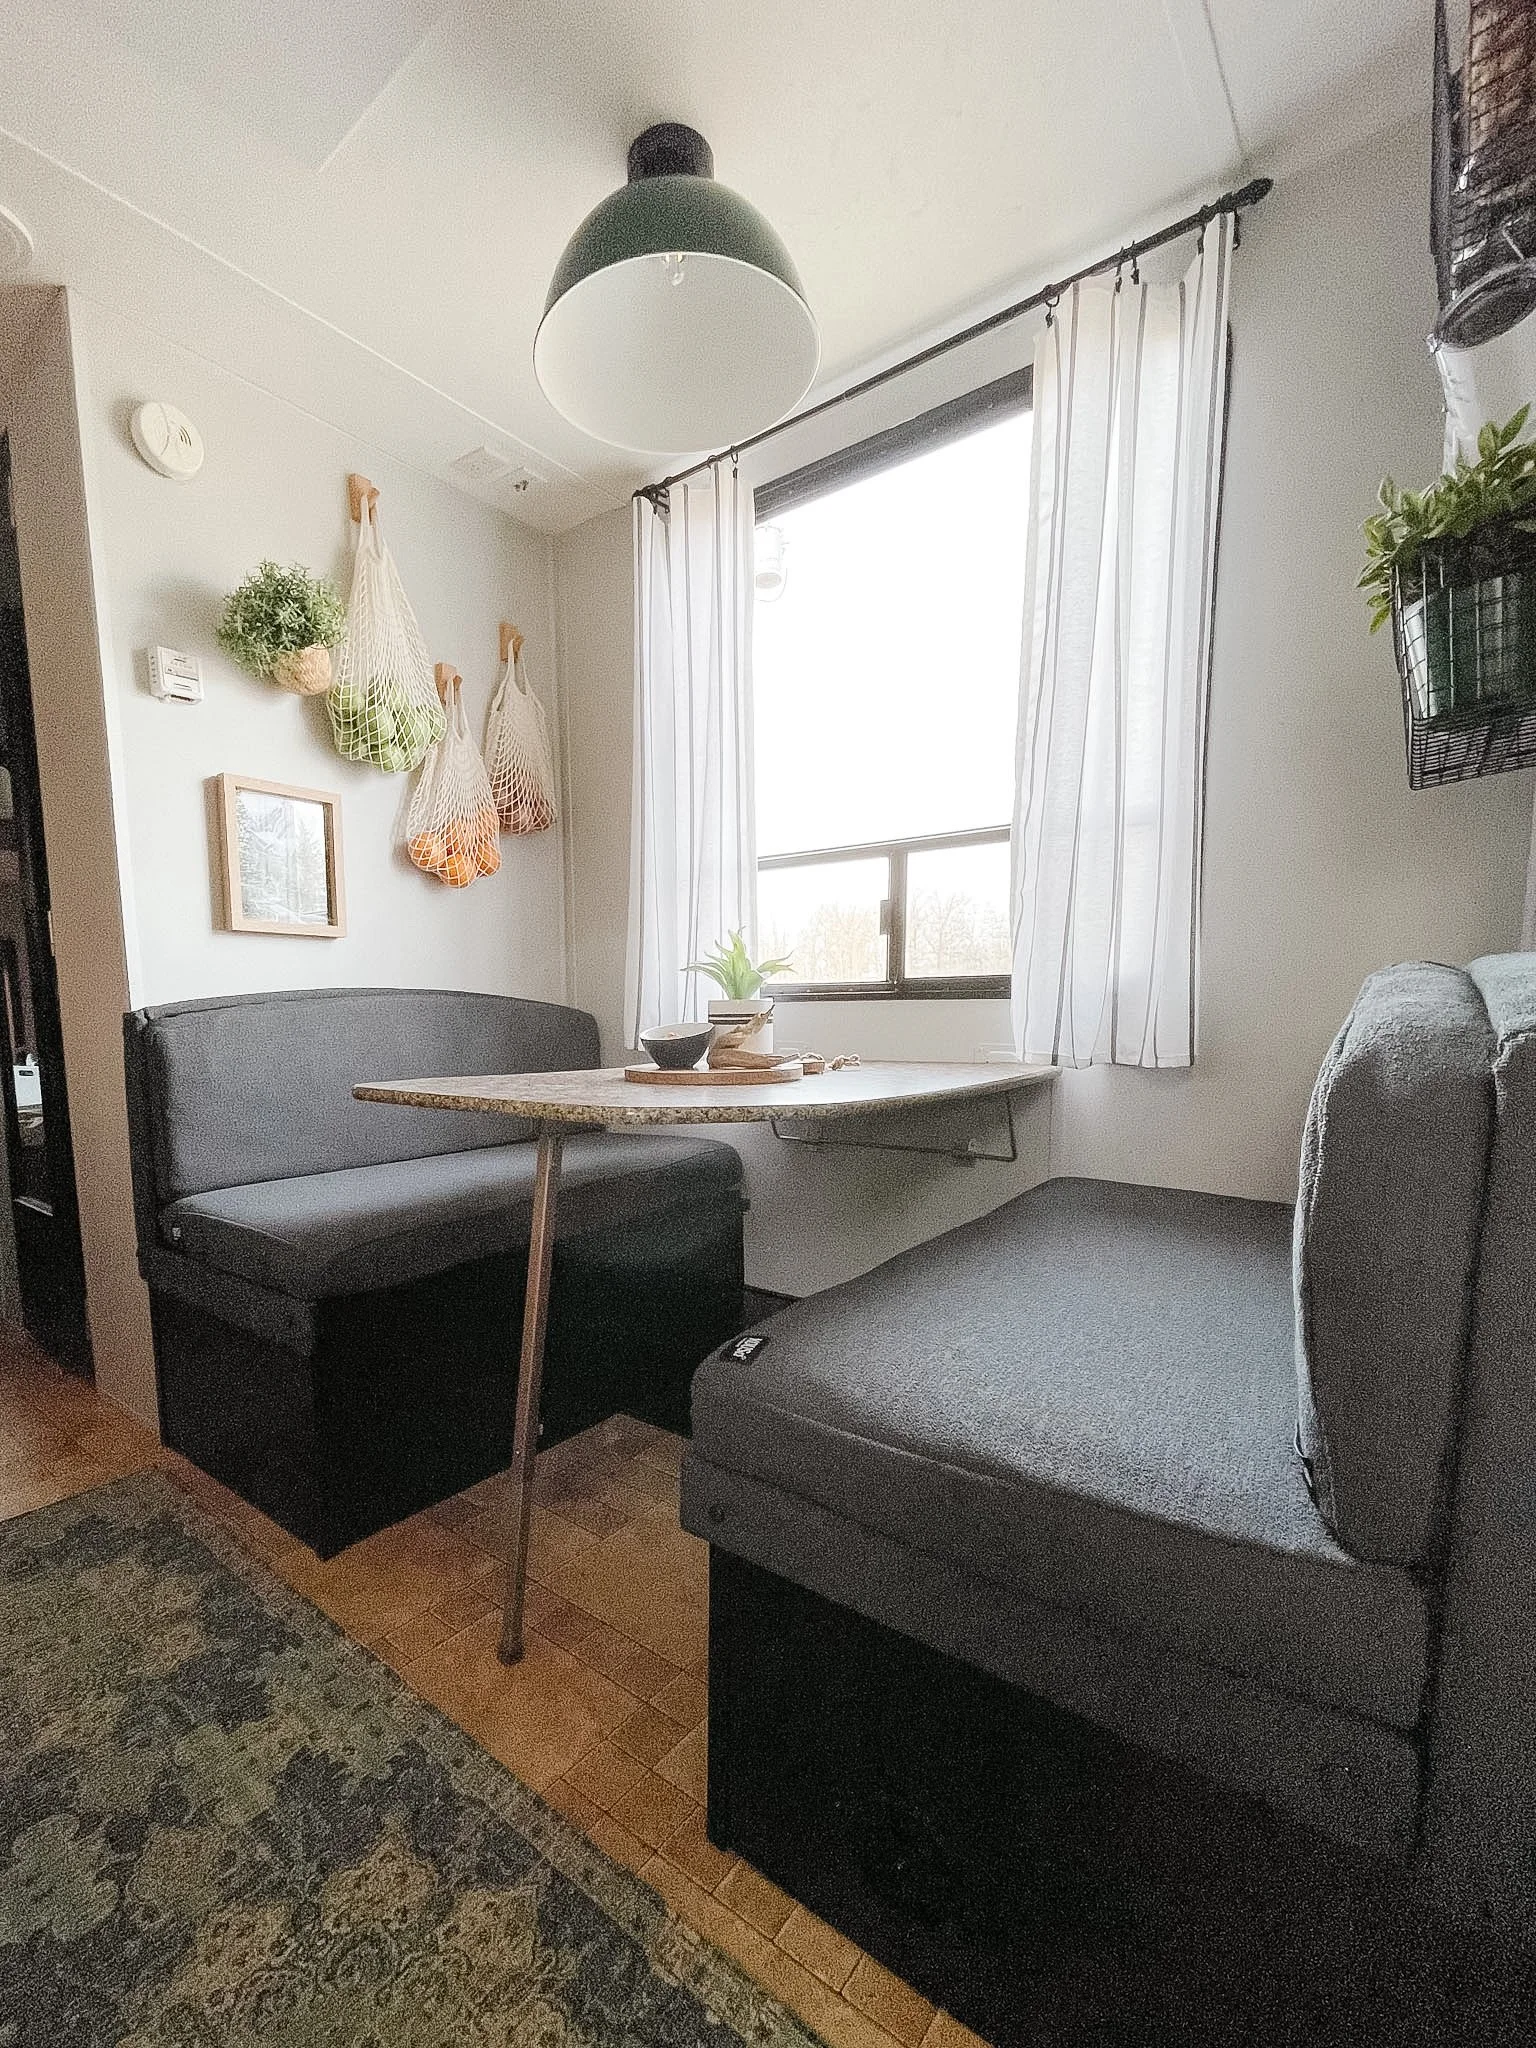
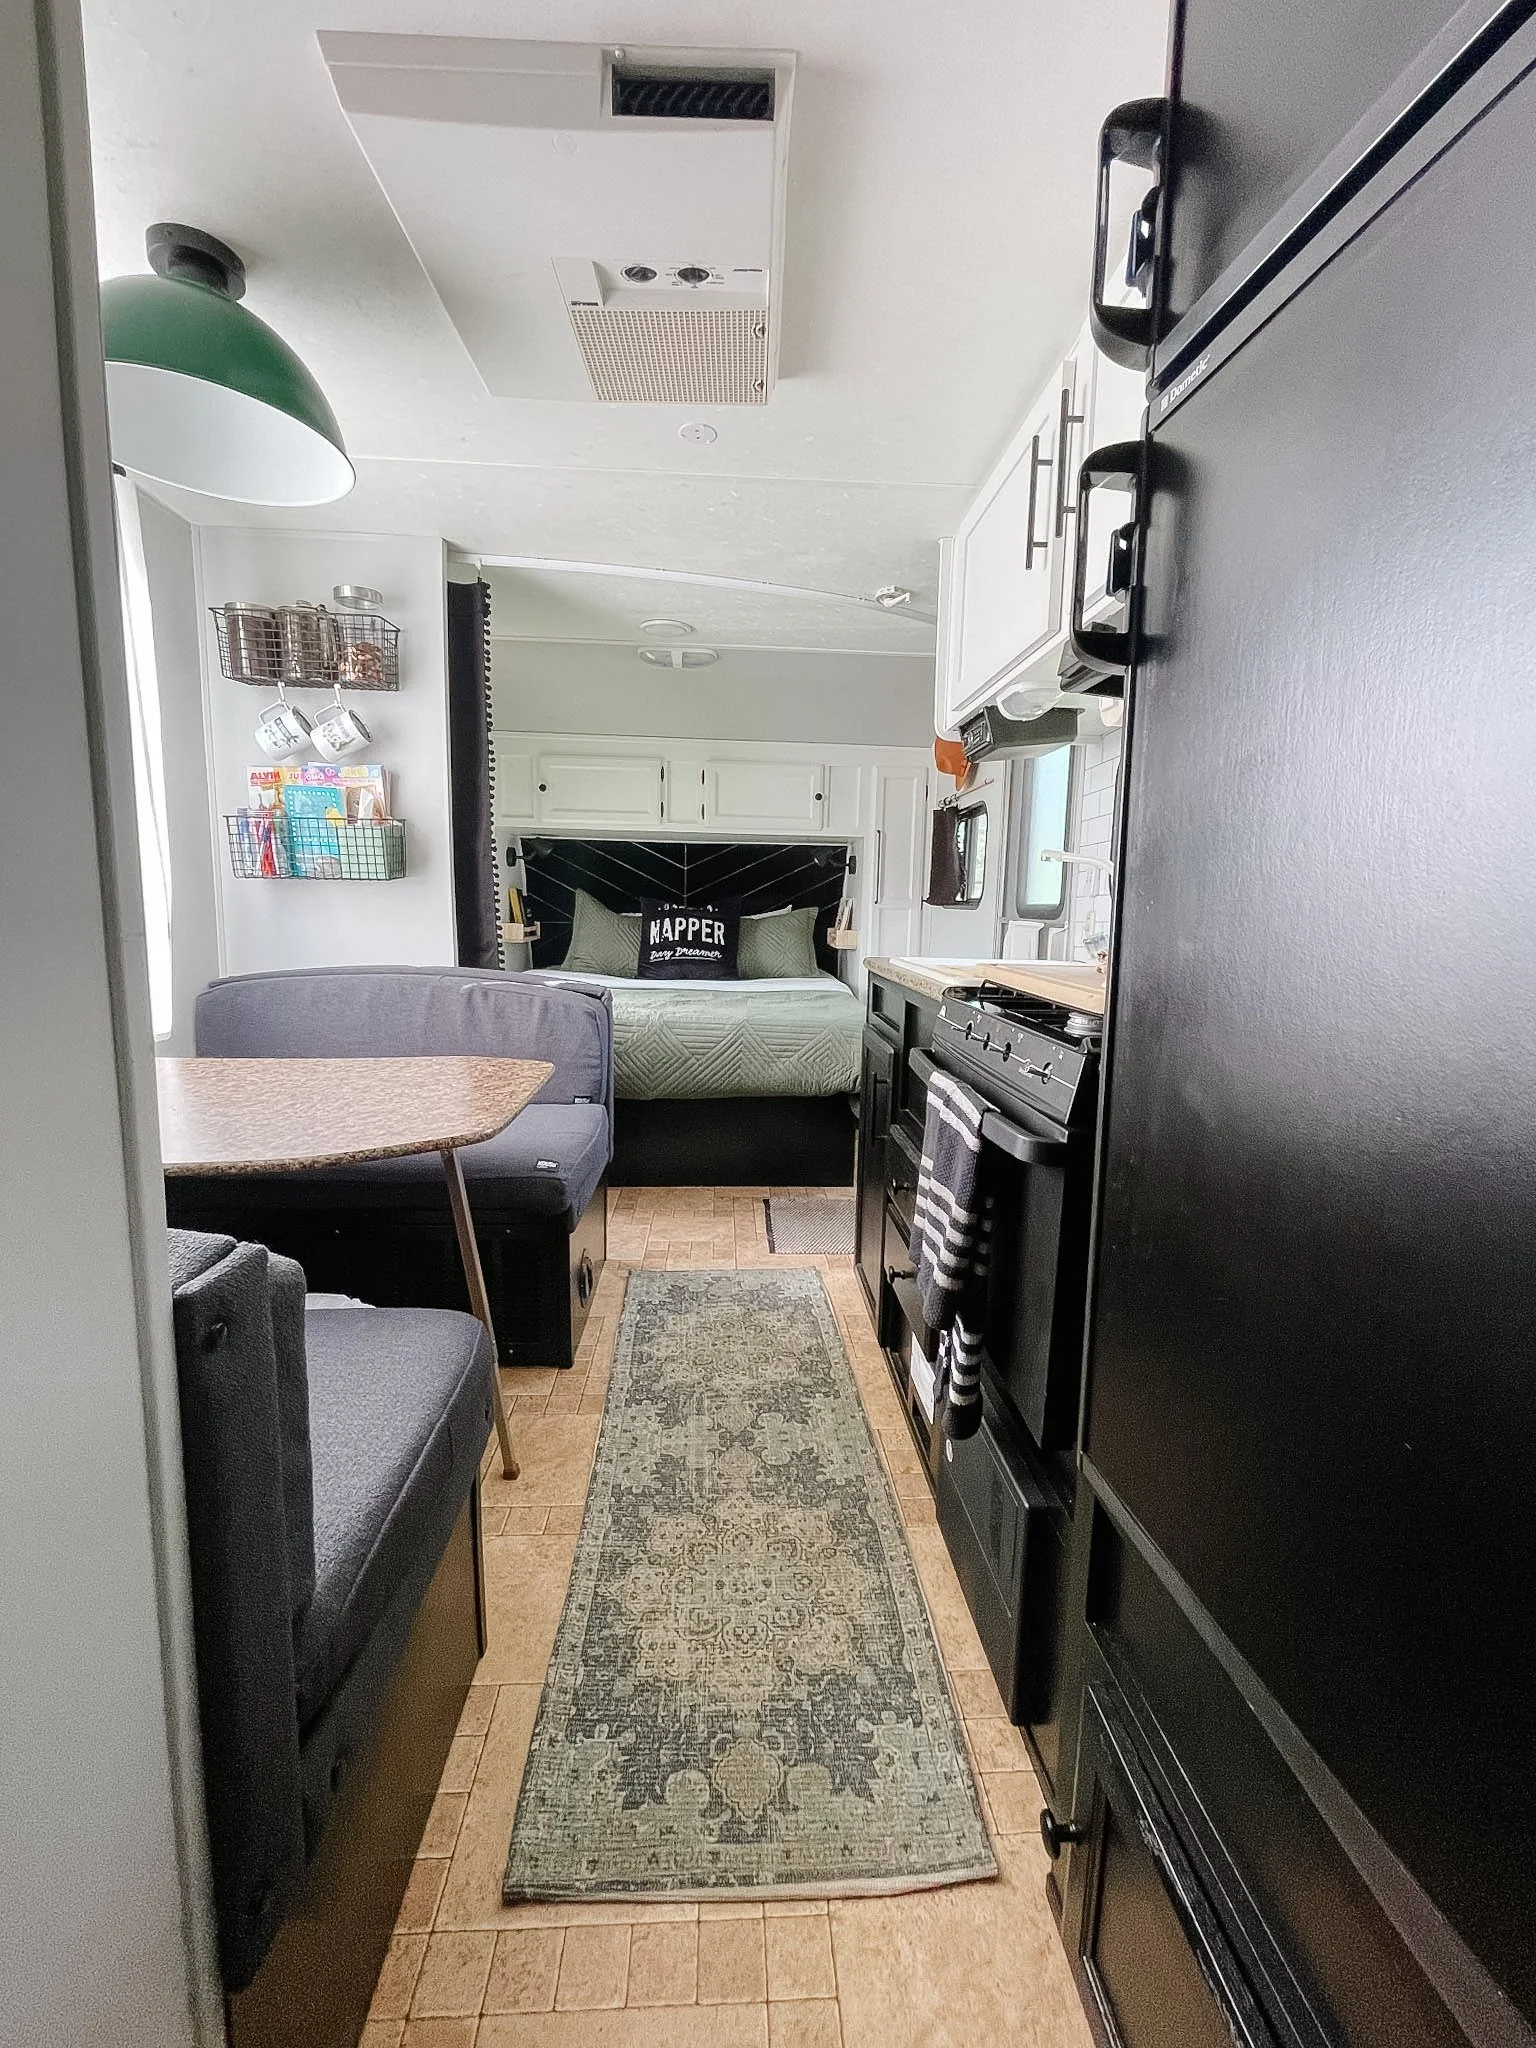
Don't Replace Your Floors—Cover Them
Replacing RV flooring can be expensive and time-consuming.
Instead, consider adding a beautiful runner rug.
Not only does it hide dated flooring, but it also adds warmth, colour, and personality to the space.
We chose a vintage-inspired runner that tied together the greens, blacks, and warm neutrals throughout the camper.
Bonus: Runners are easy to shake out and replace if they get worn over time. This runner is washable!

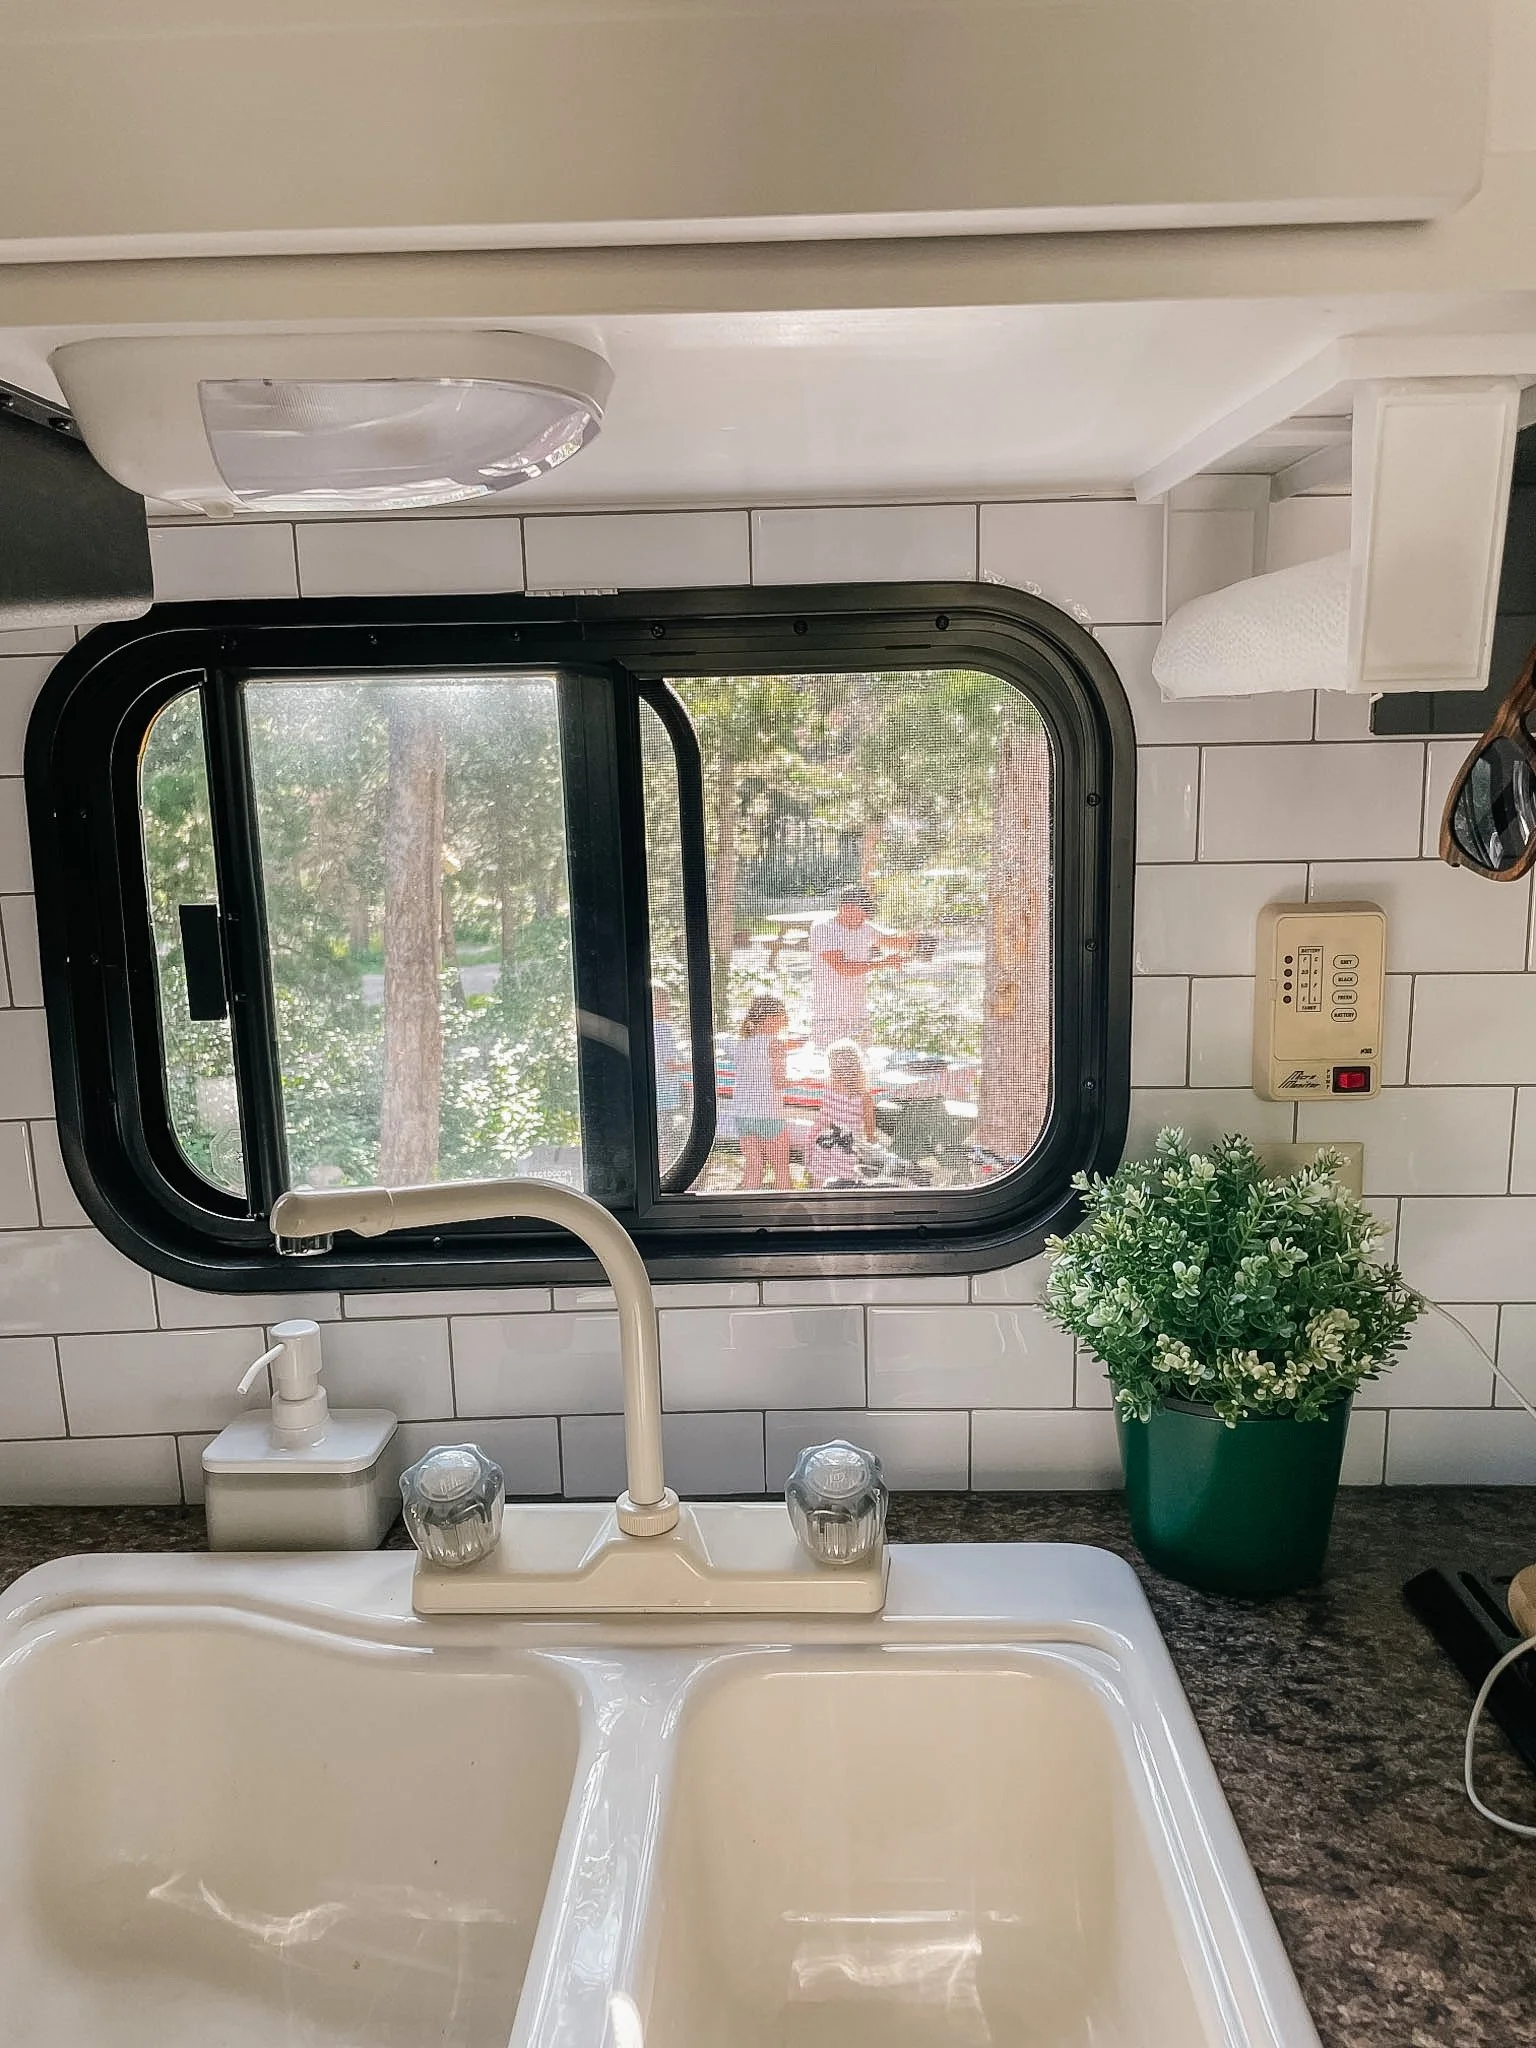
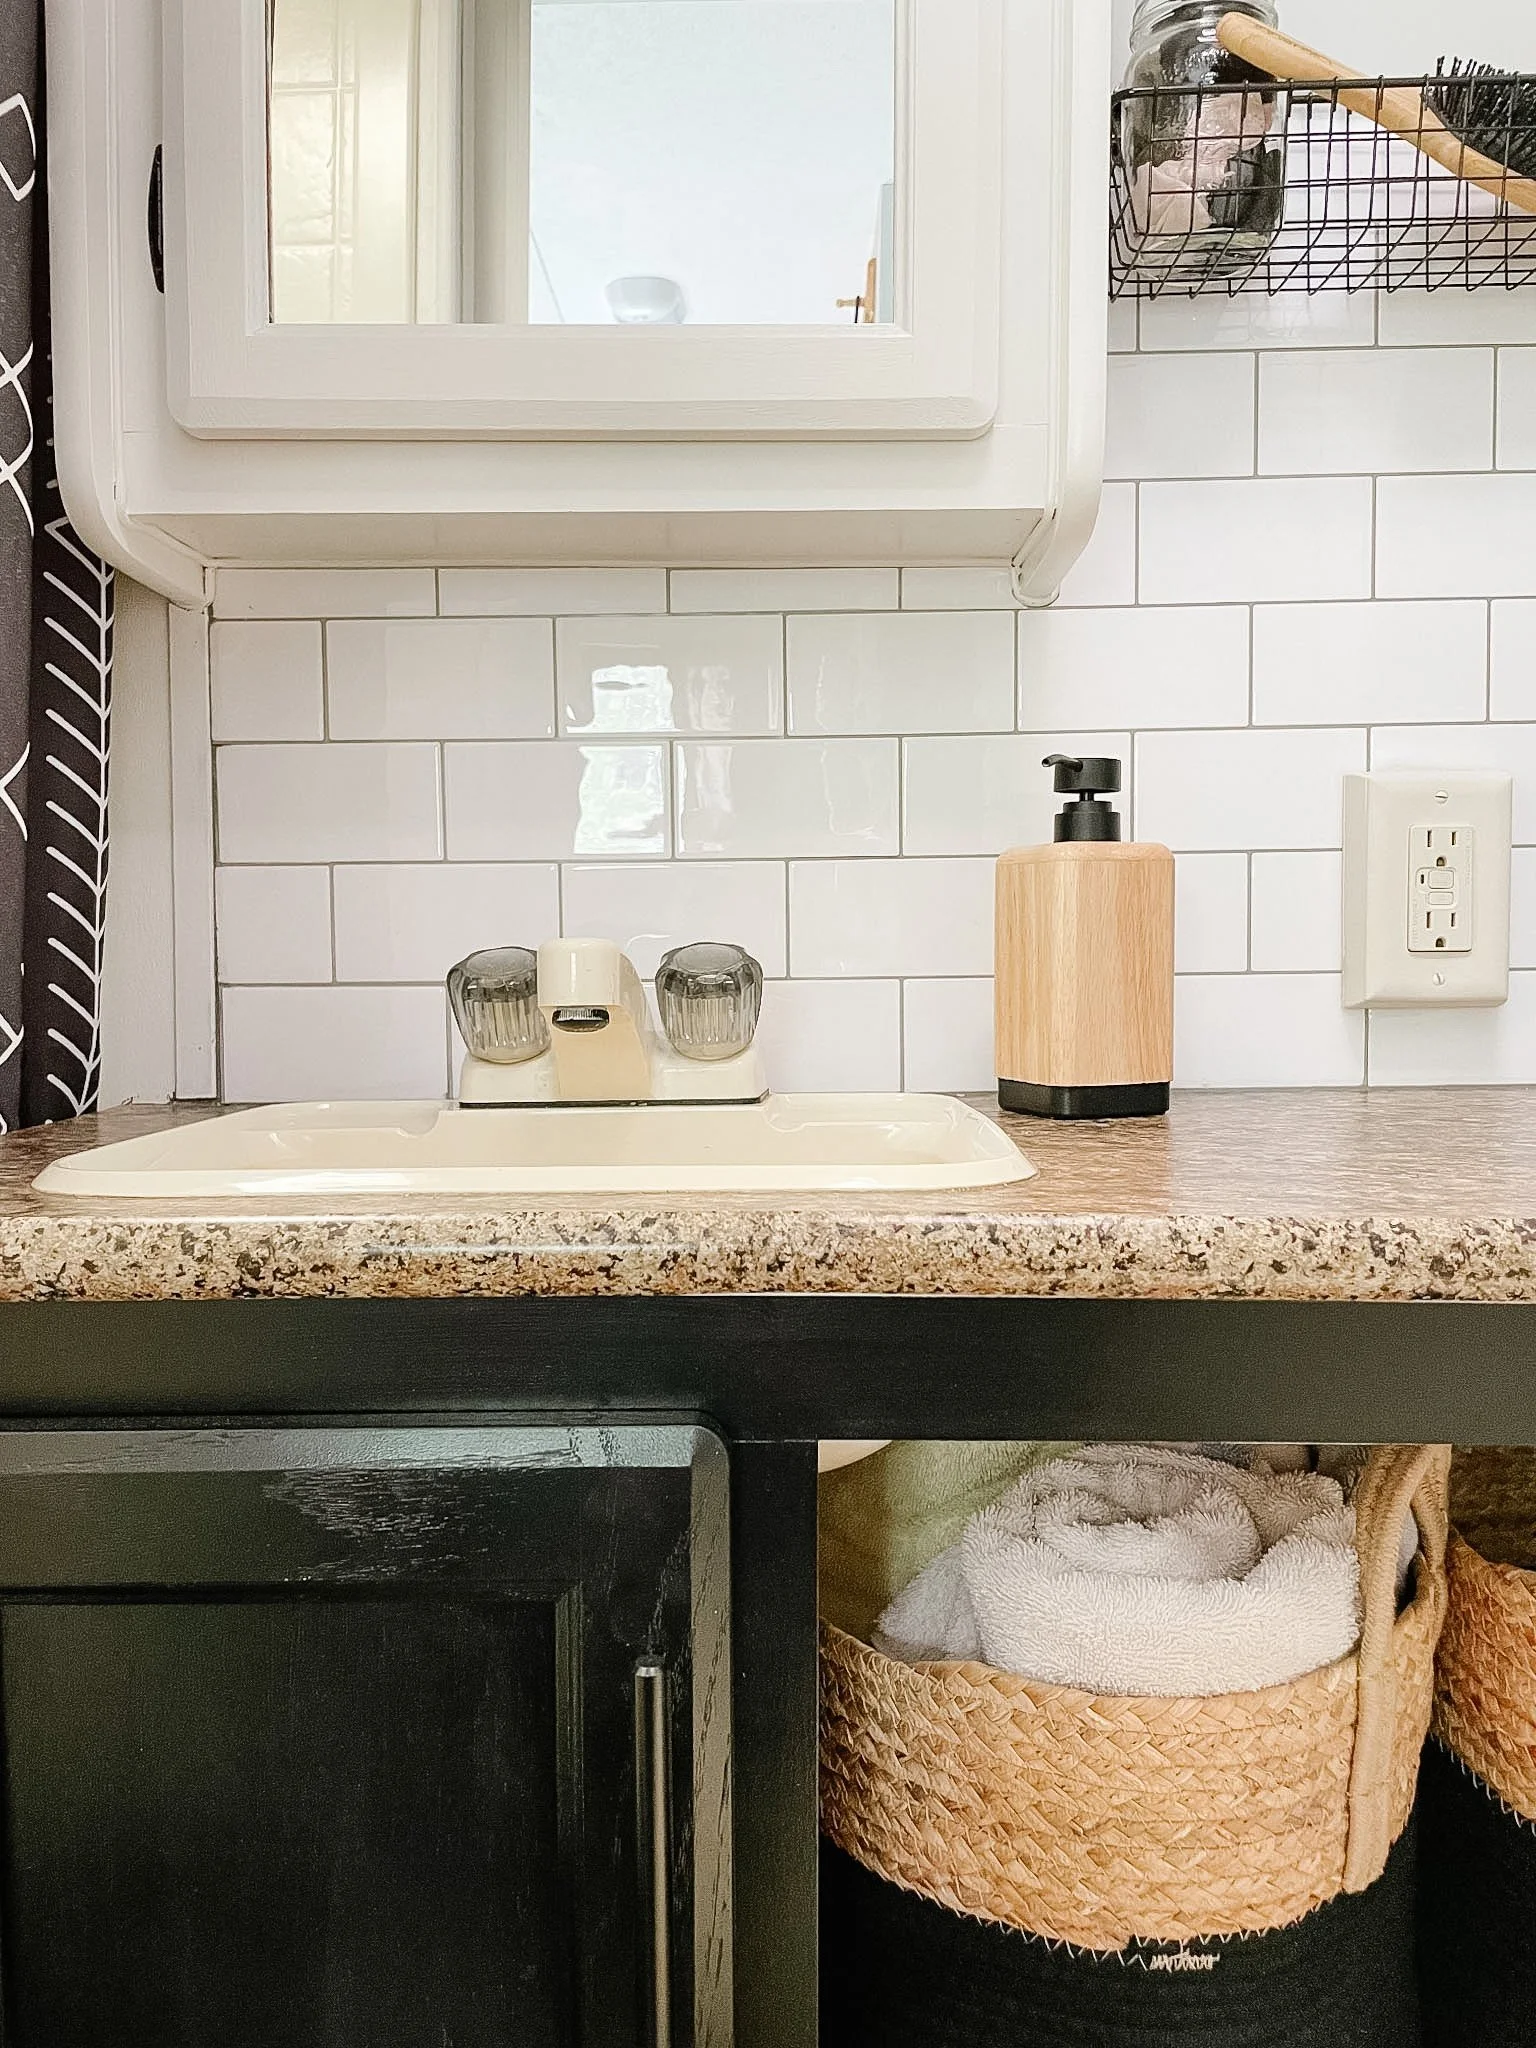
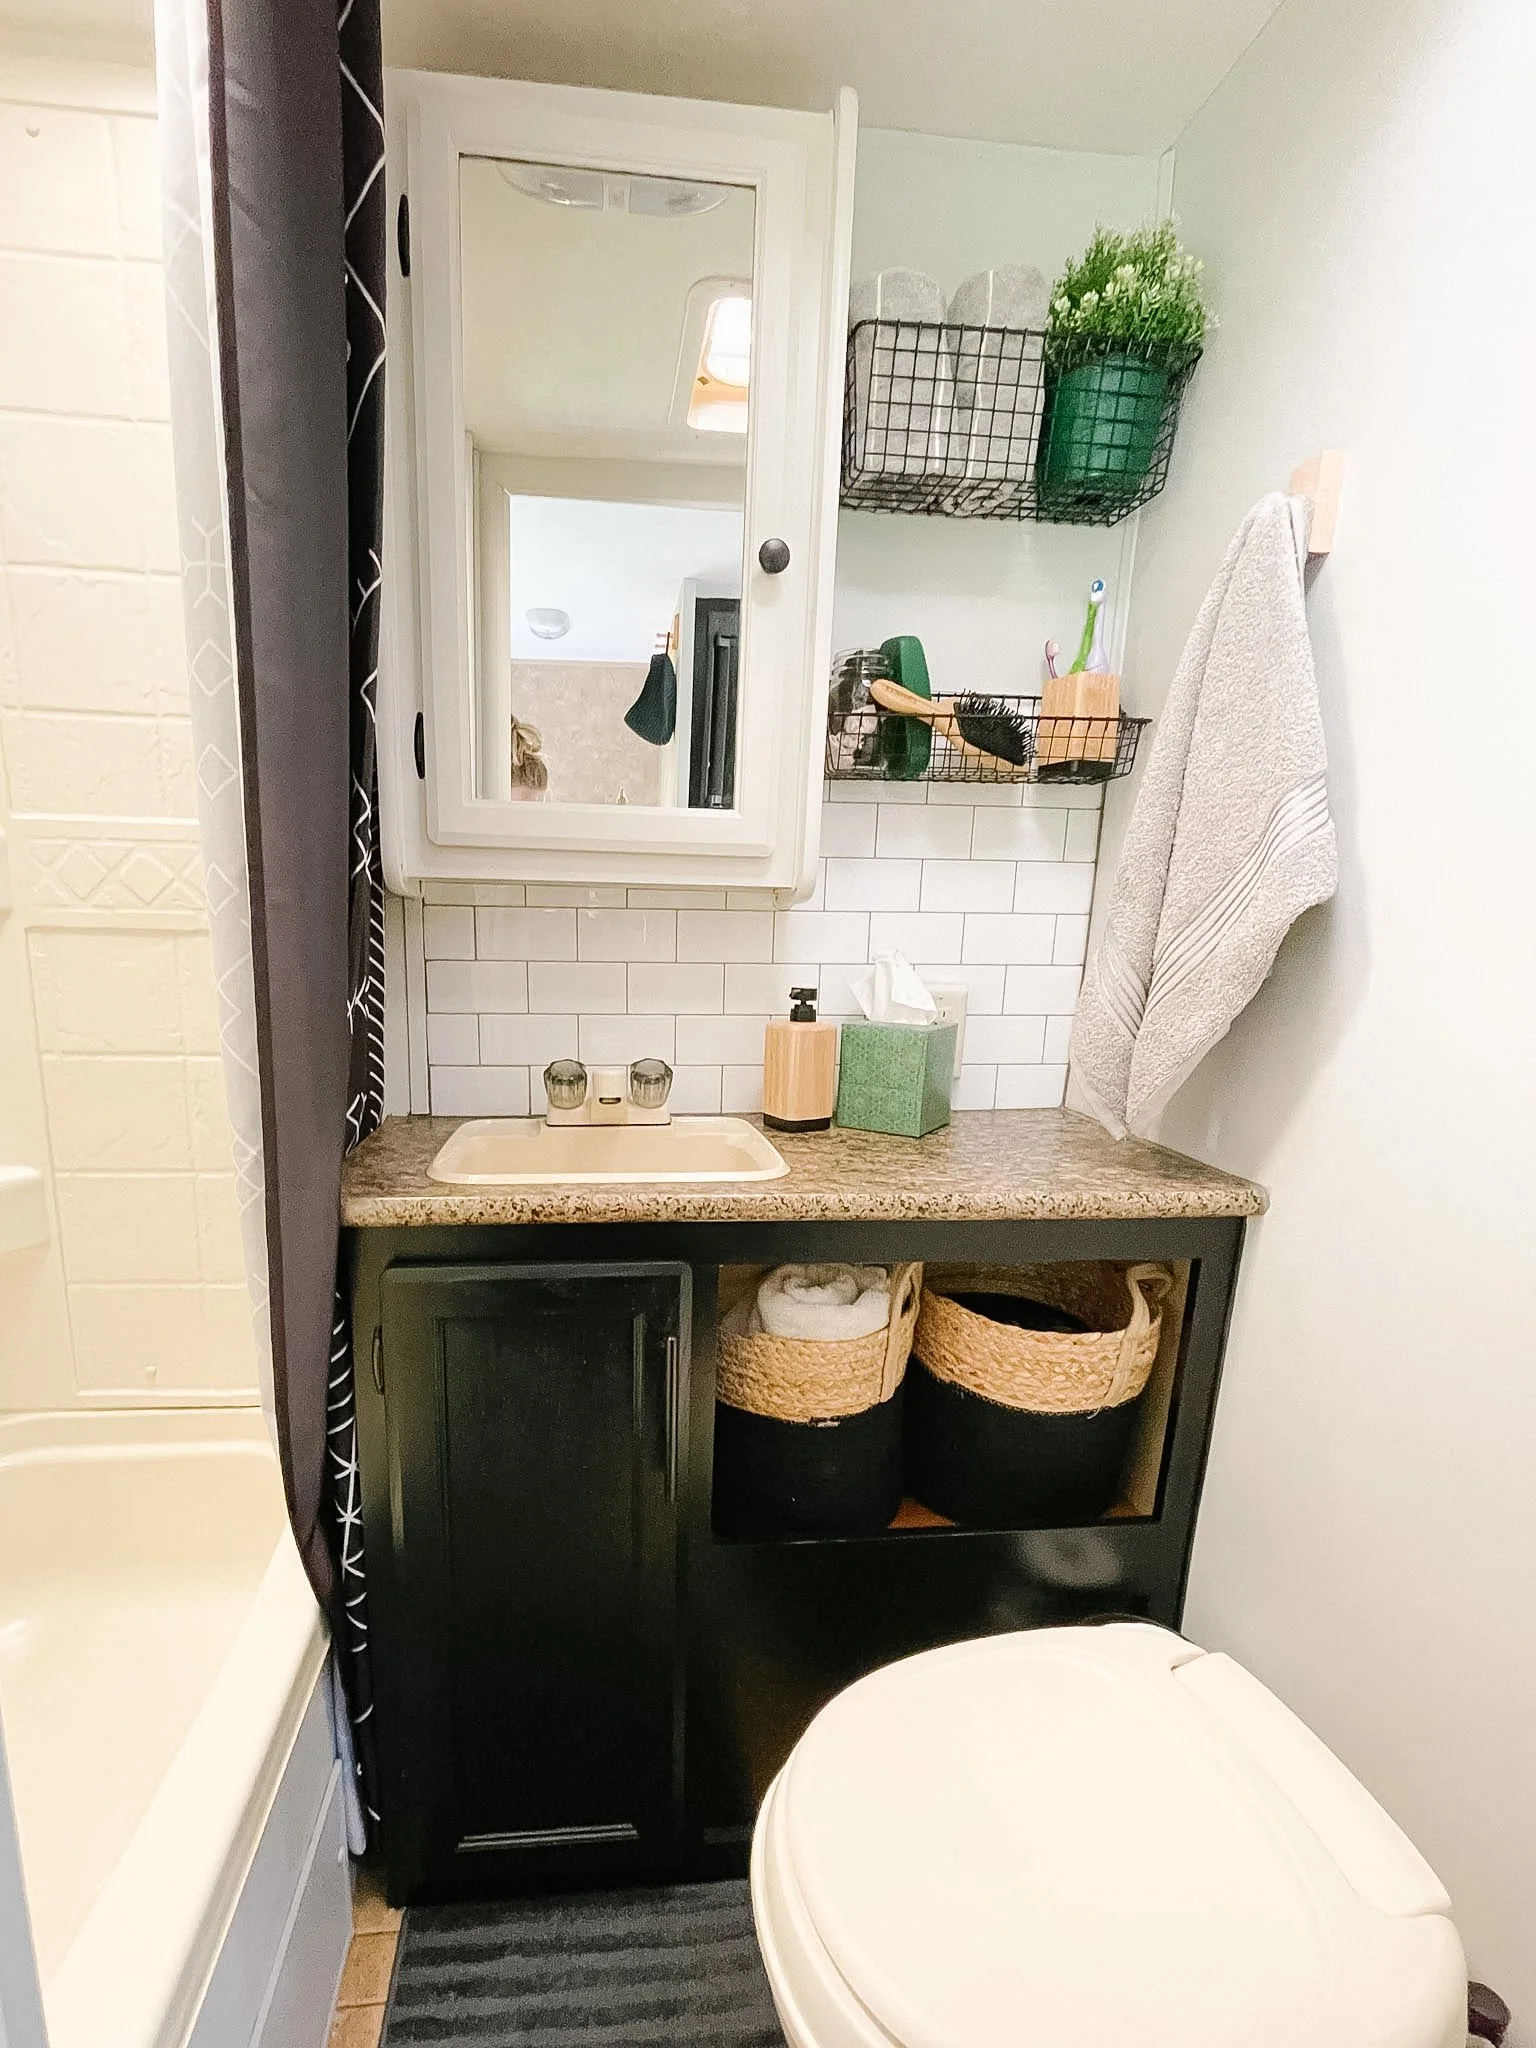
Add Character With Peel-and-Stick Backsplash
Tile can be heavy and difficult to install in a camper.
Peel-and-stick backsplash tiles are an affordable alternative that instantly elevates a kitchen or the bathroom.
The white subway tile style we chose brightened the space and created the look of a custom renovation without the cost or weight. This is what I used.
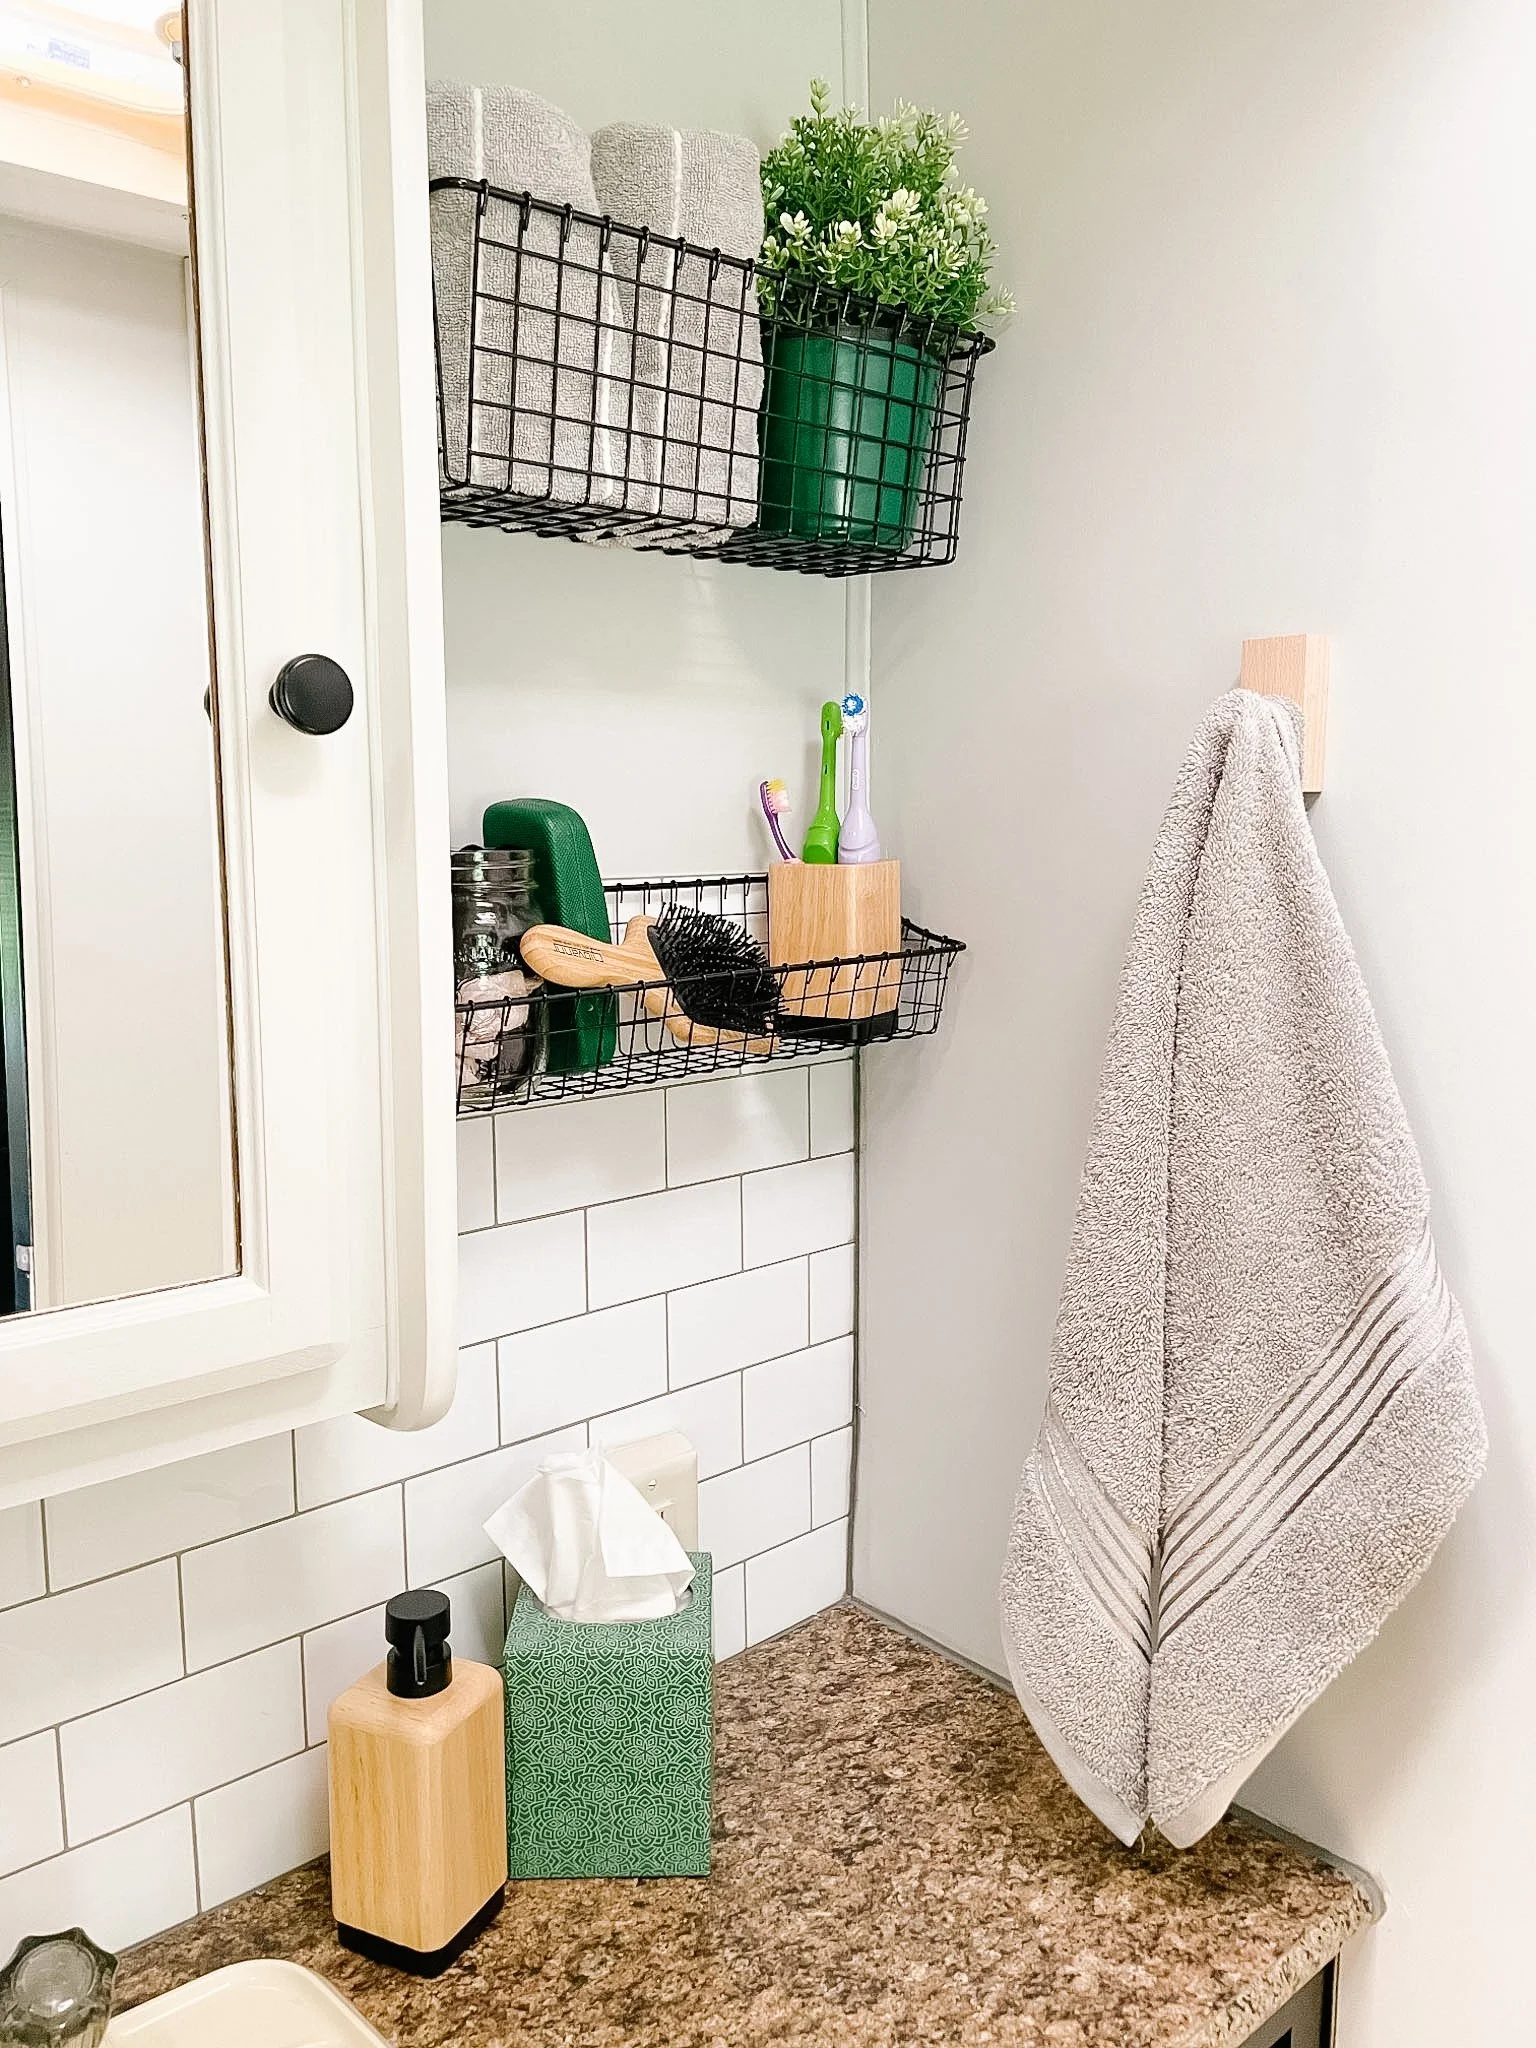
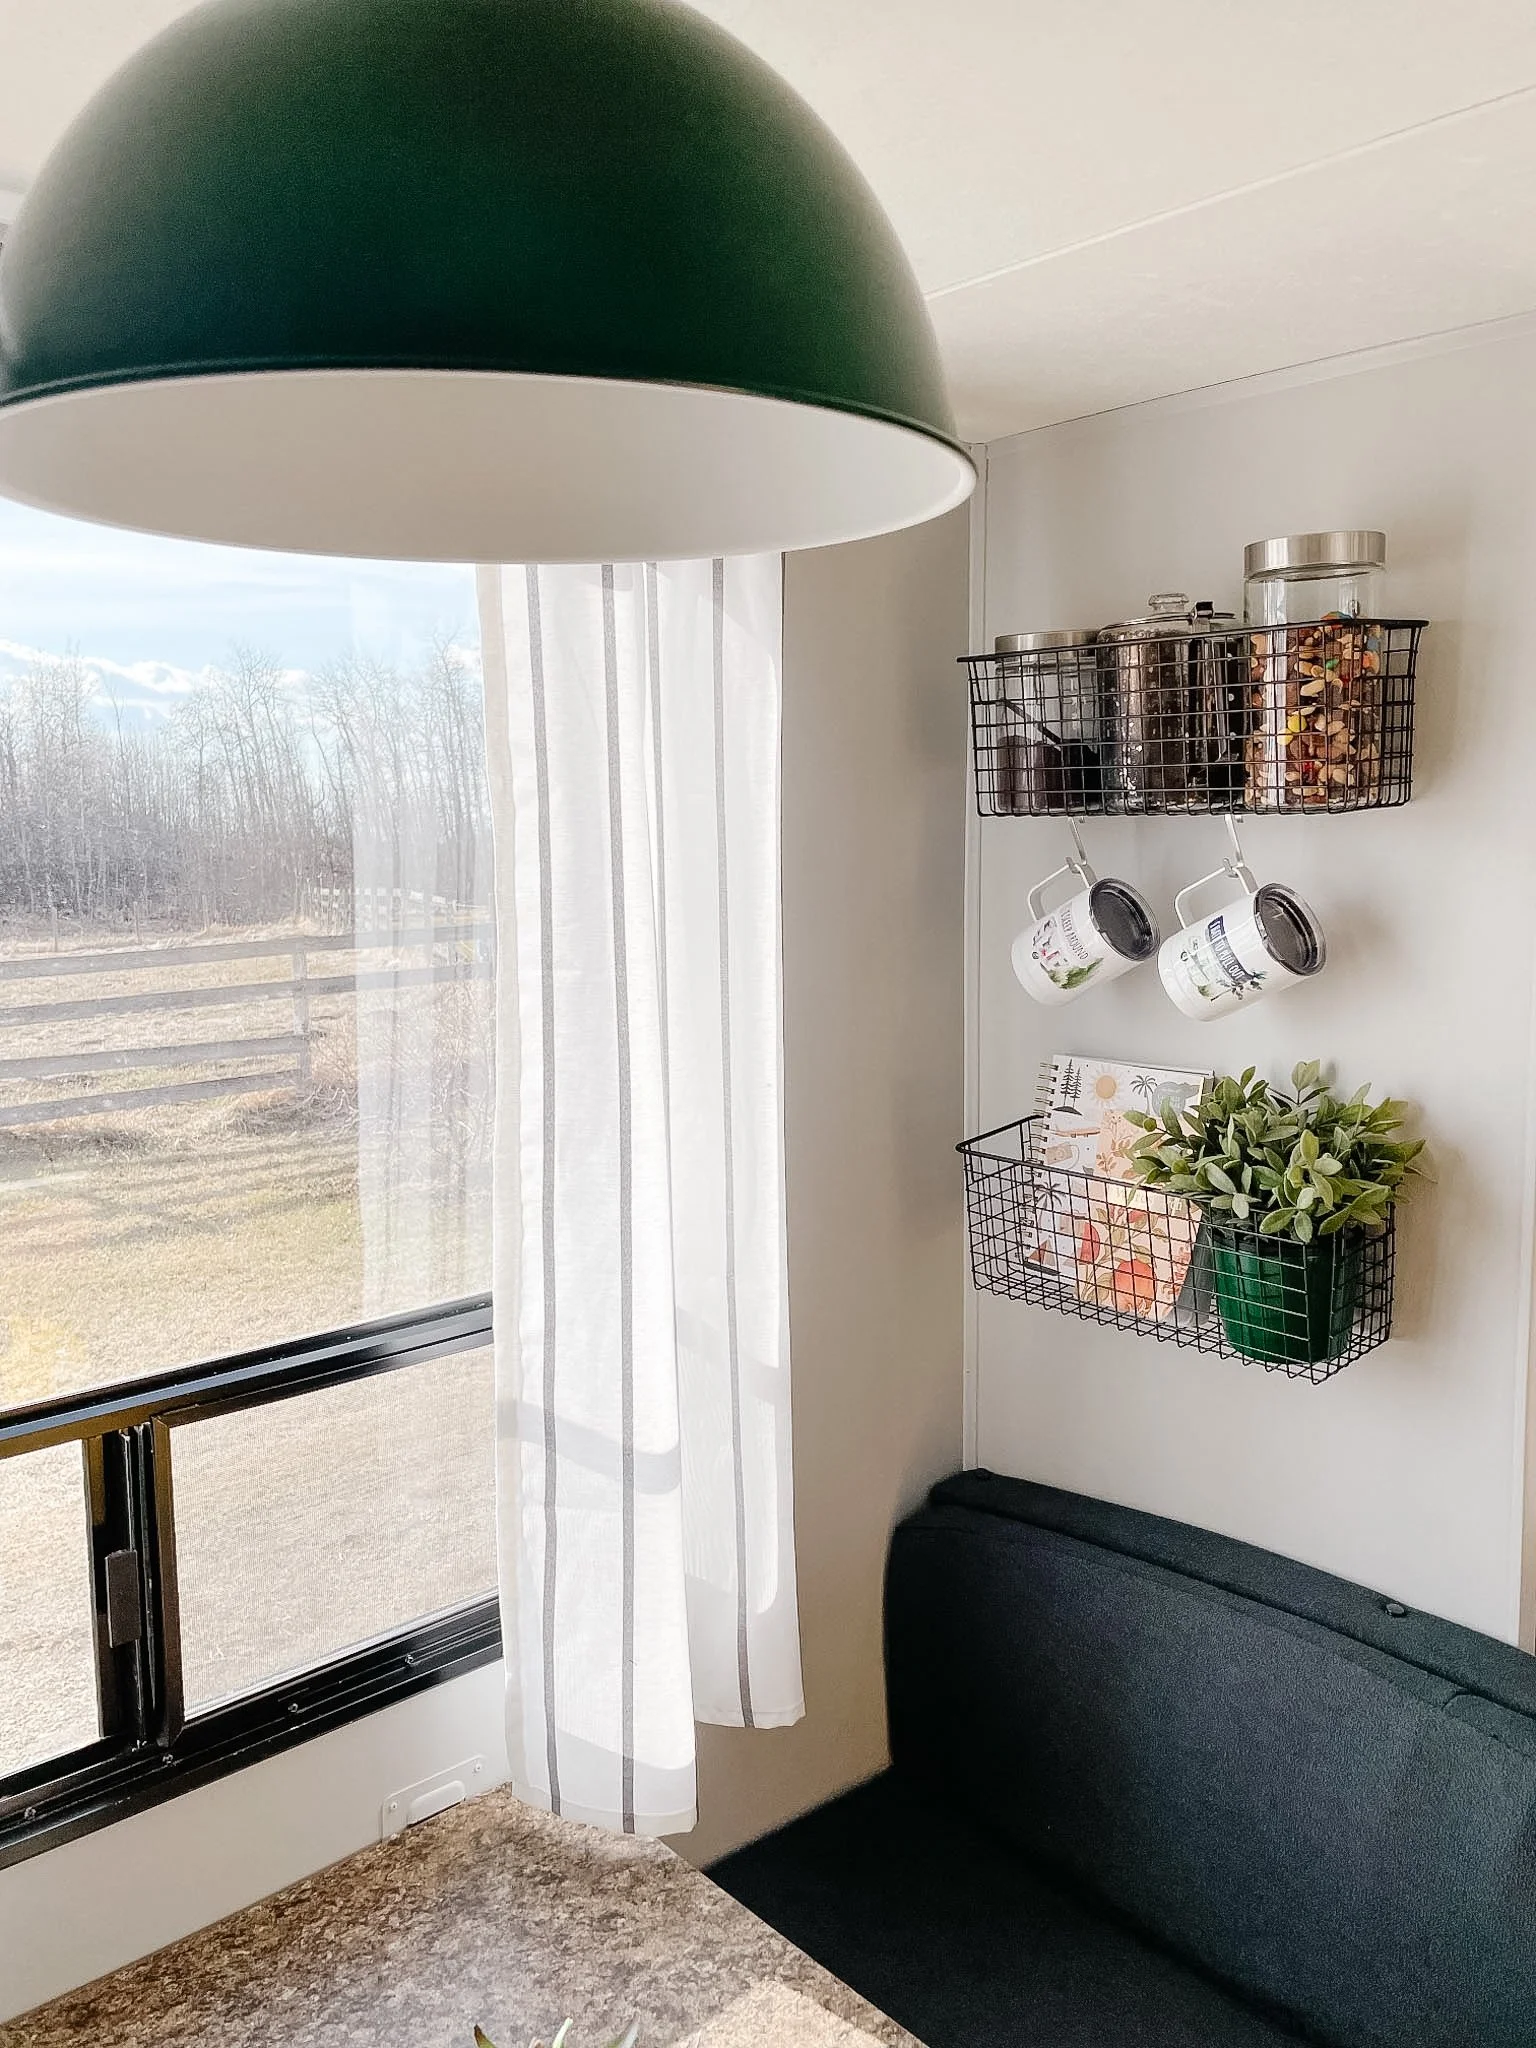
Make Your Walls Work Harder
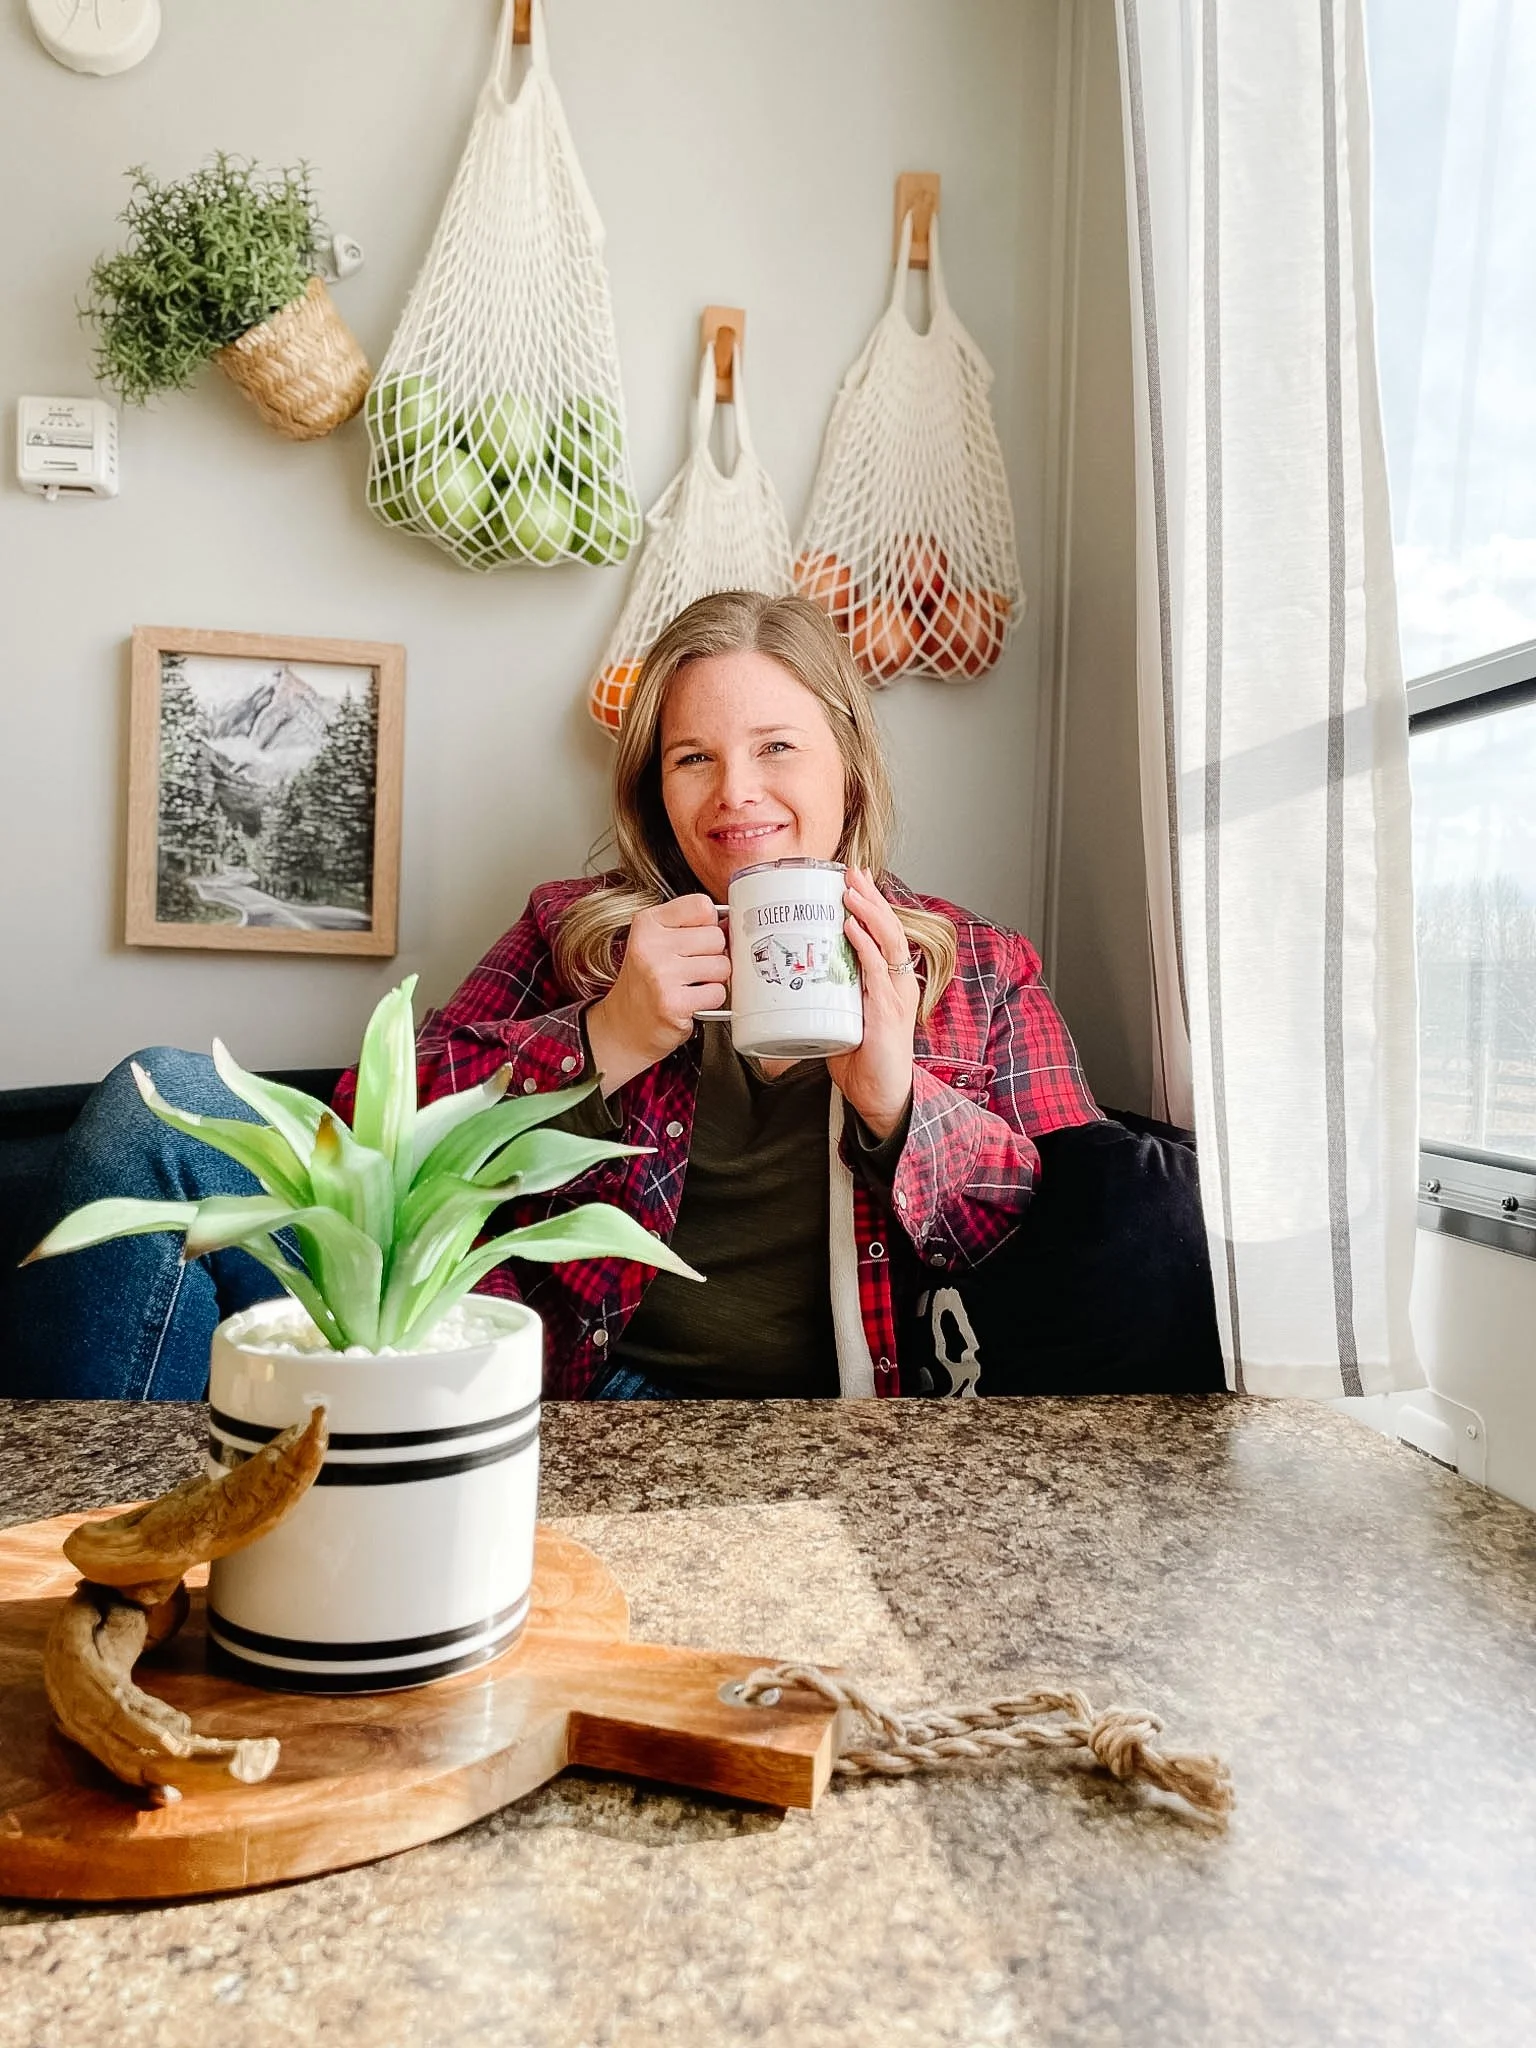
In a small space, every inch counts. Use Vertical Space. Campers don't offer much storage, so think vertically!
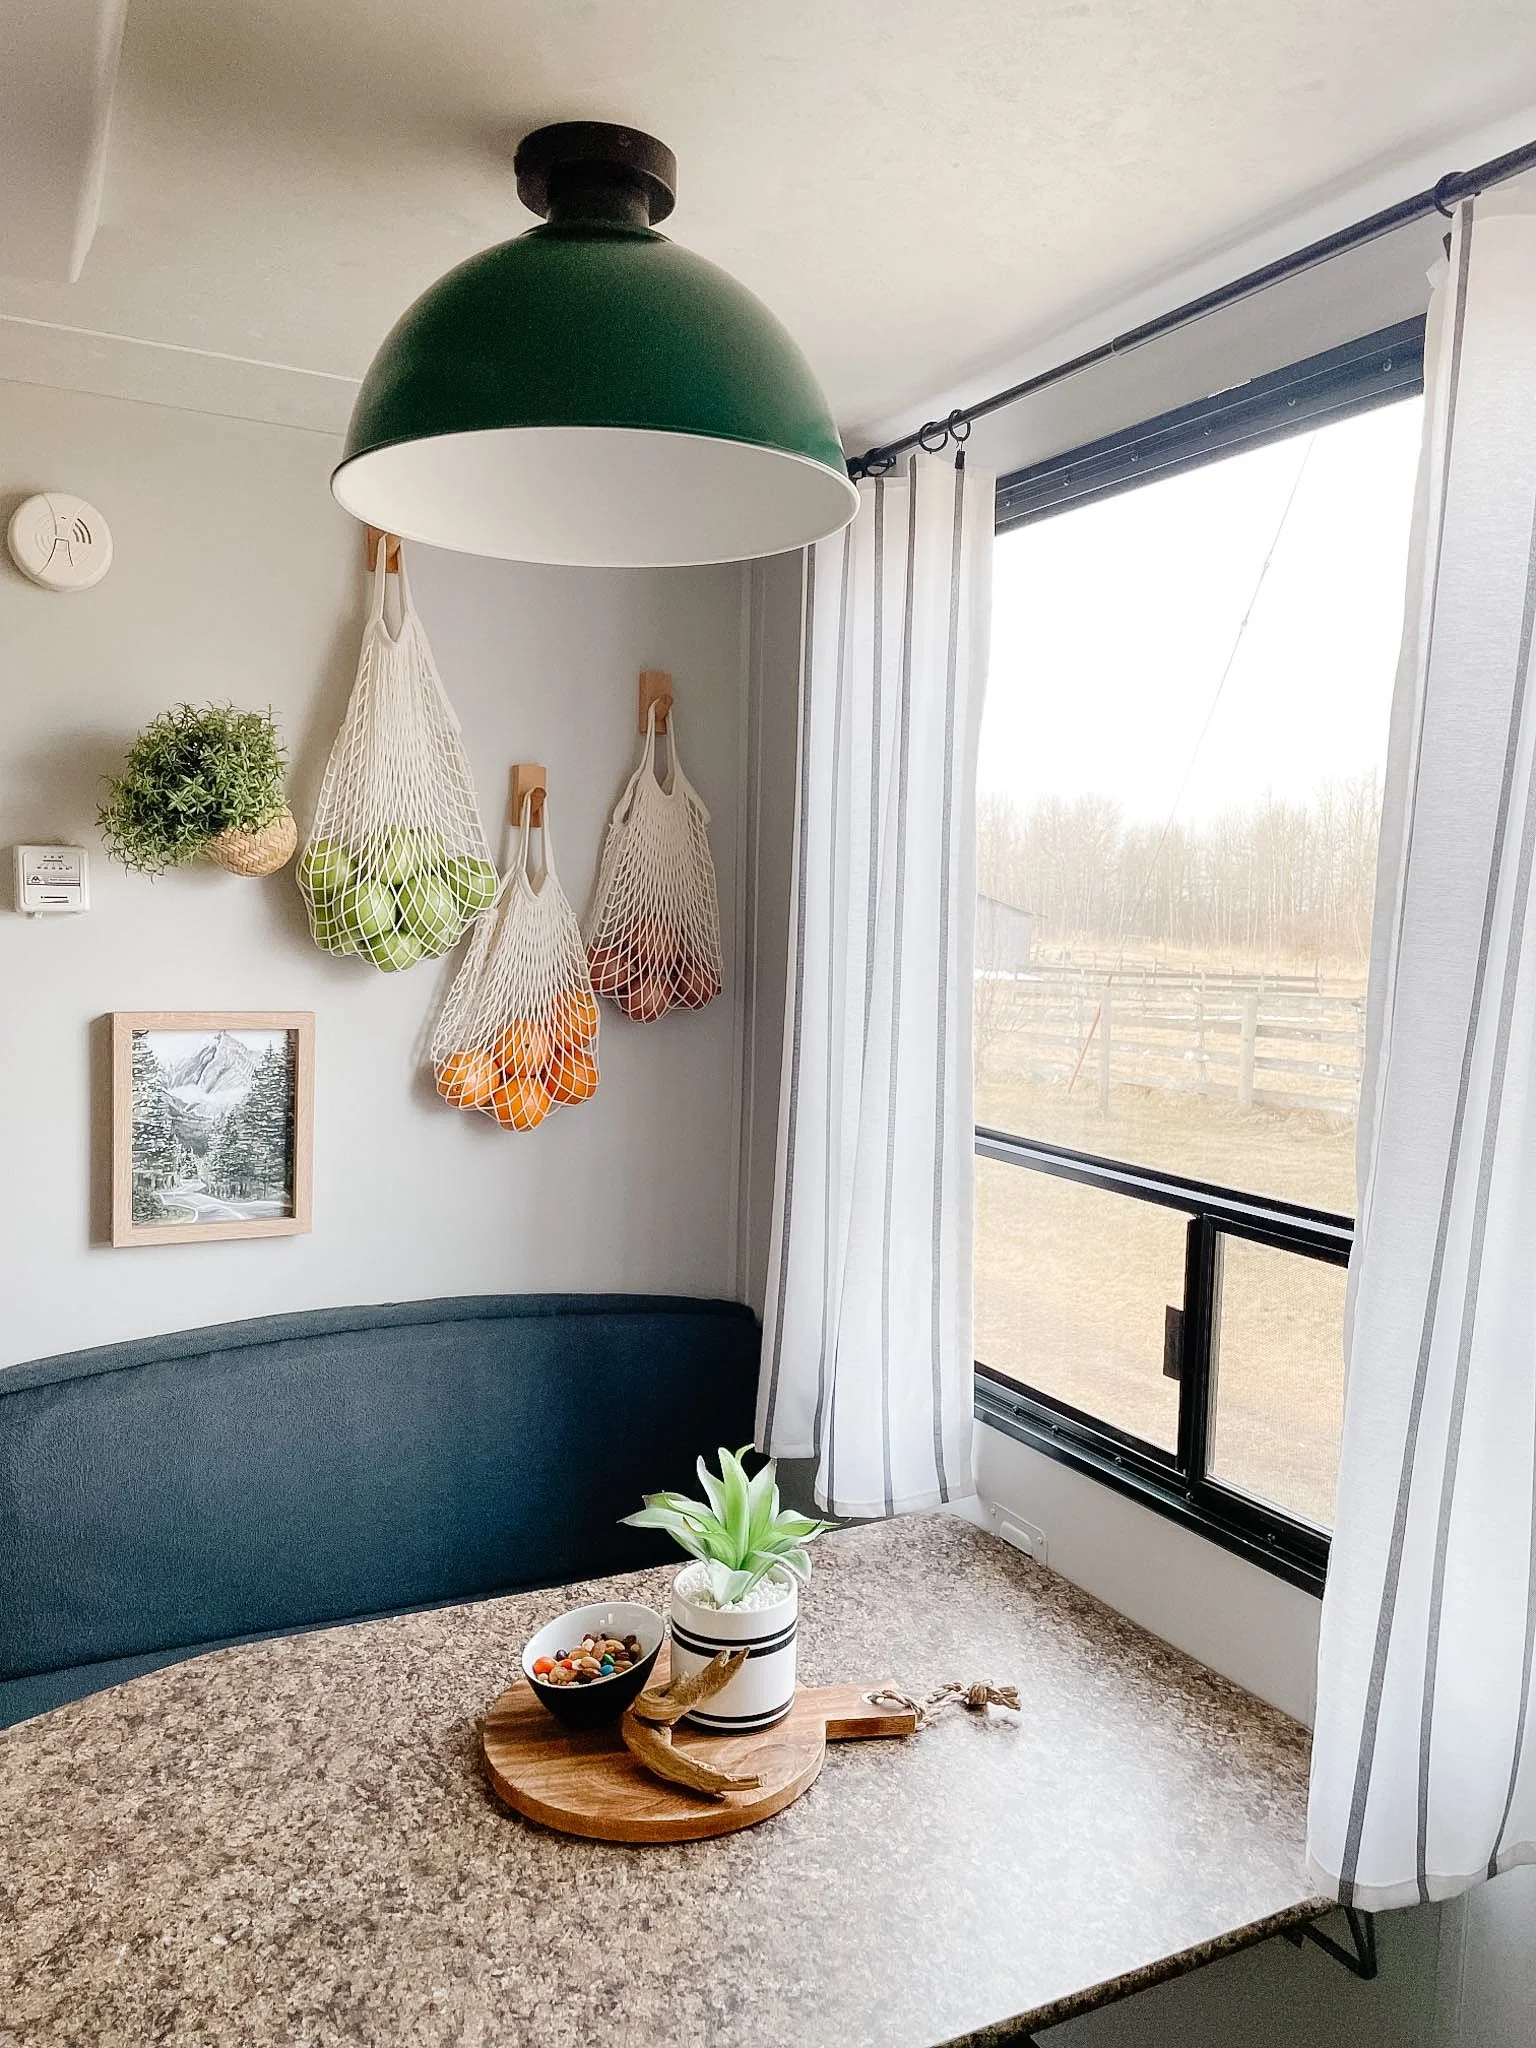
One of my favorite additions was using removable wire baskets to create extra storage. As well as hooks for hanging fruit or coats and hats!
They work beautifully for:
Paper products
Snacks
Kitchen essentials
Books and magazines
Charging cords
Fruit and veggies in mesh bags
Hats and coats
The best part about these baskets I used is they can easily be removed and secured while traveling. And I suggest taking down any hanging fruit or veggies while you travel, I left them up one and the peaches left a good smear on the wall haha. I take them down an put them on the sink till we are parked. Some items I used.


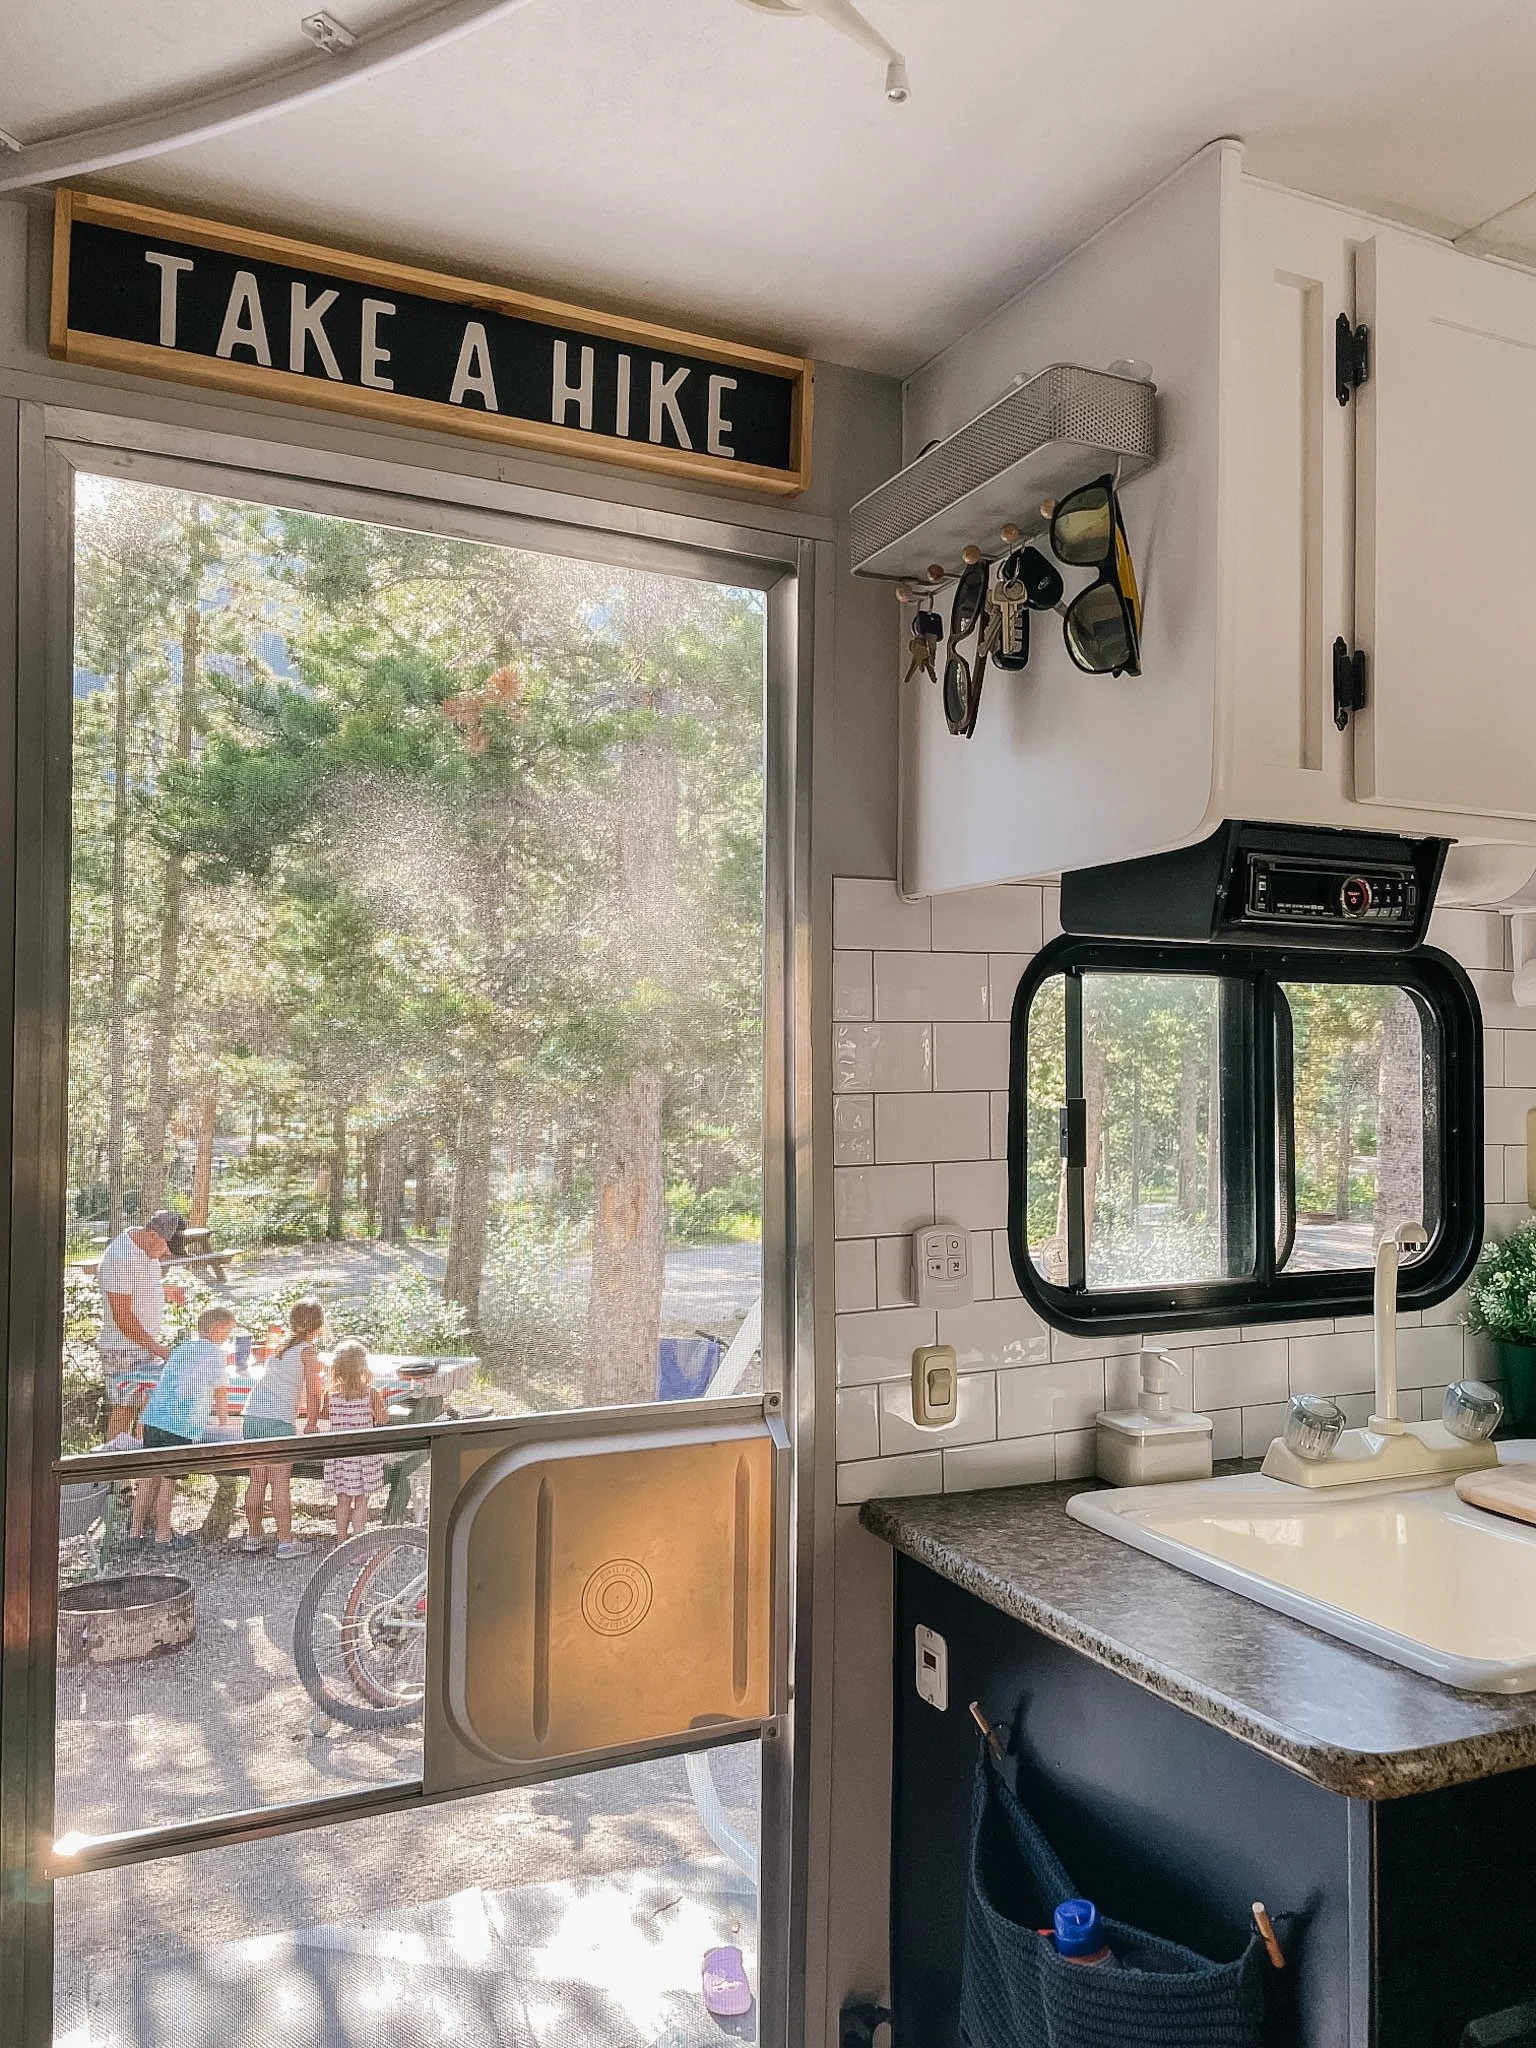
Upgrade Your Lighting
Lighting can completely change the mood of a space.
In the kitchen we updated the light with a 12Volt light with a switch (which is required for RV lights) But something nicer than those white plastic options. This one we found worked great but then I just changed out the boring glass shade with something more fun!
In the bedroom, we added battery-operated sconces that gave us the look of hardwired lighting without running electrical.
In the bathroom our only light is above the vanity which is hard to find in the dark, so I just added a push button light at hand height for the kids that works great for those late night pees.
It's a renter-friendly and RV-friendly solution that adds both function and style. Here are some great lighting options for your camper.
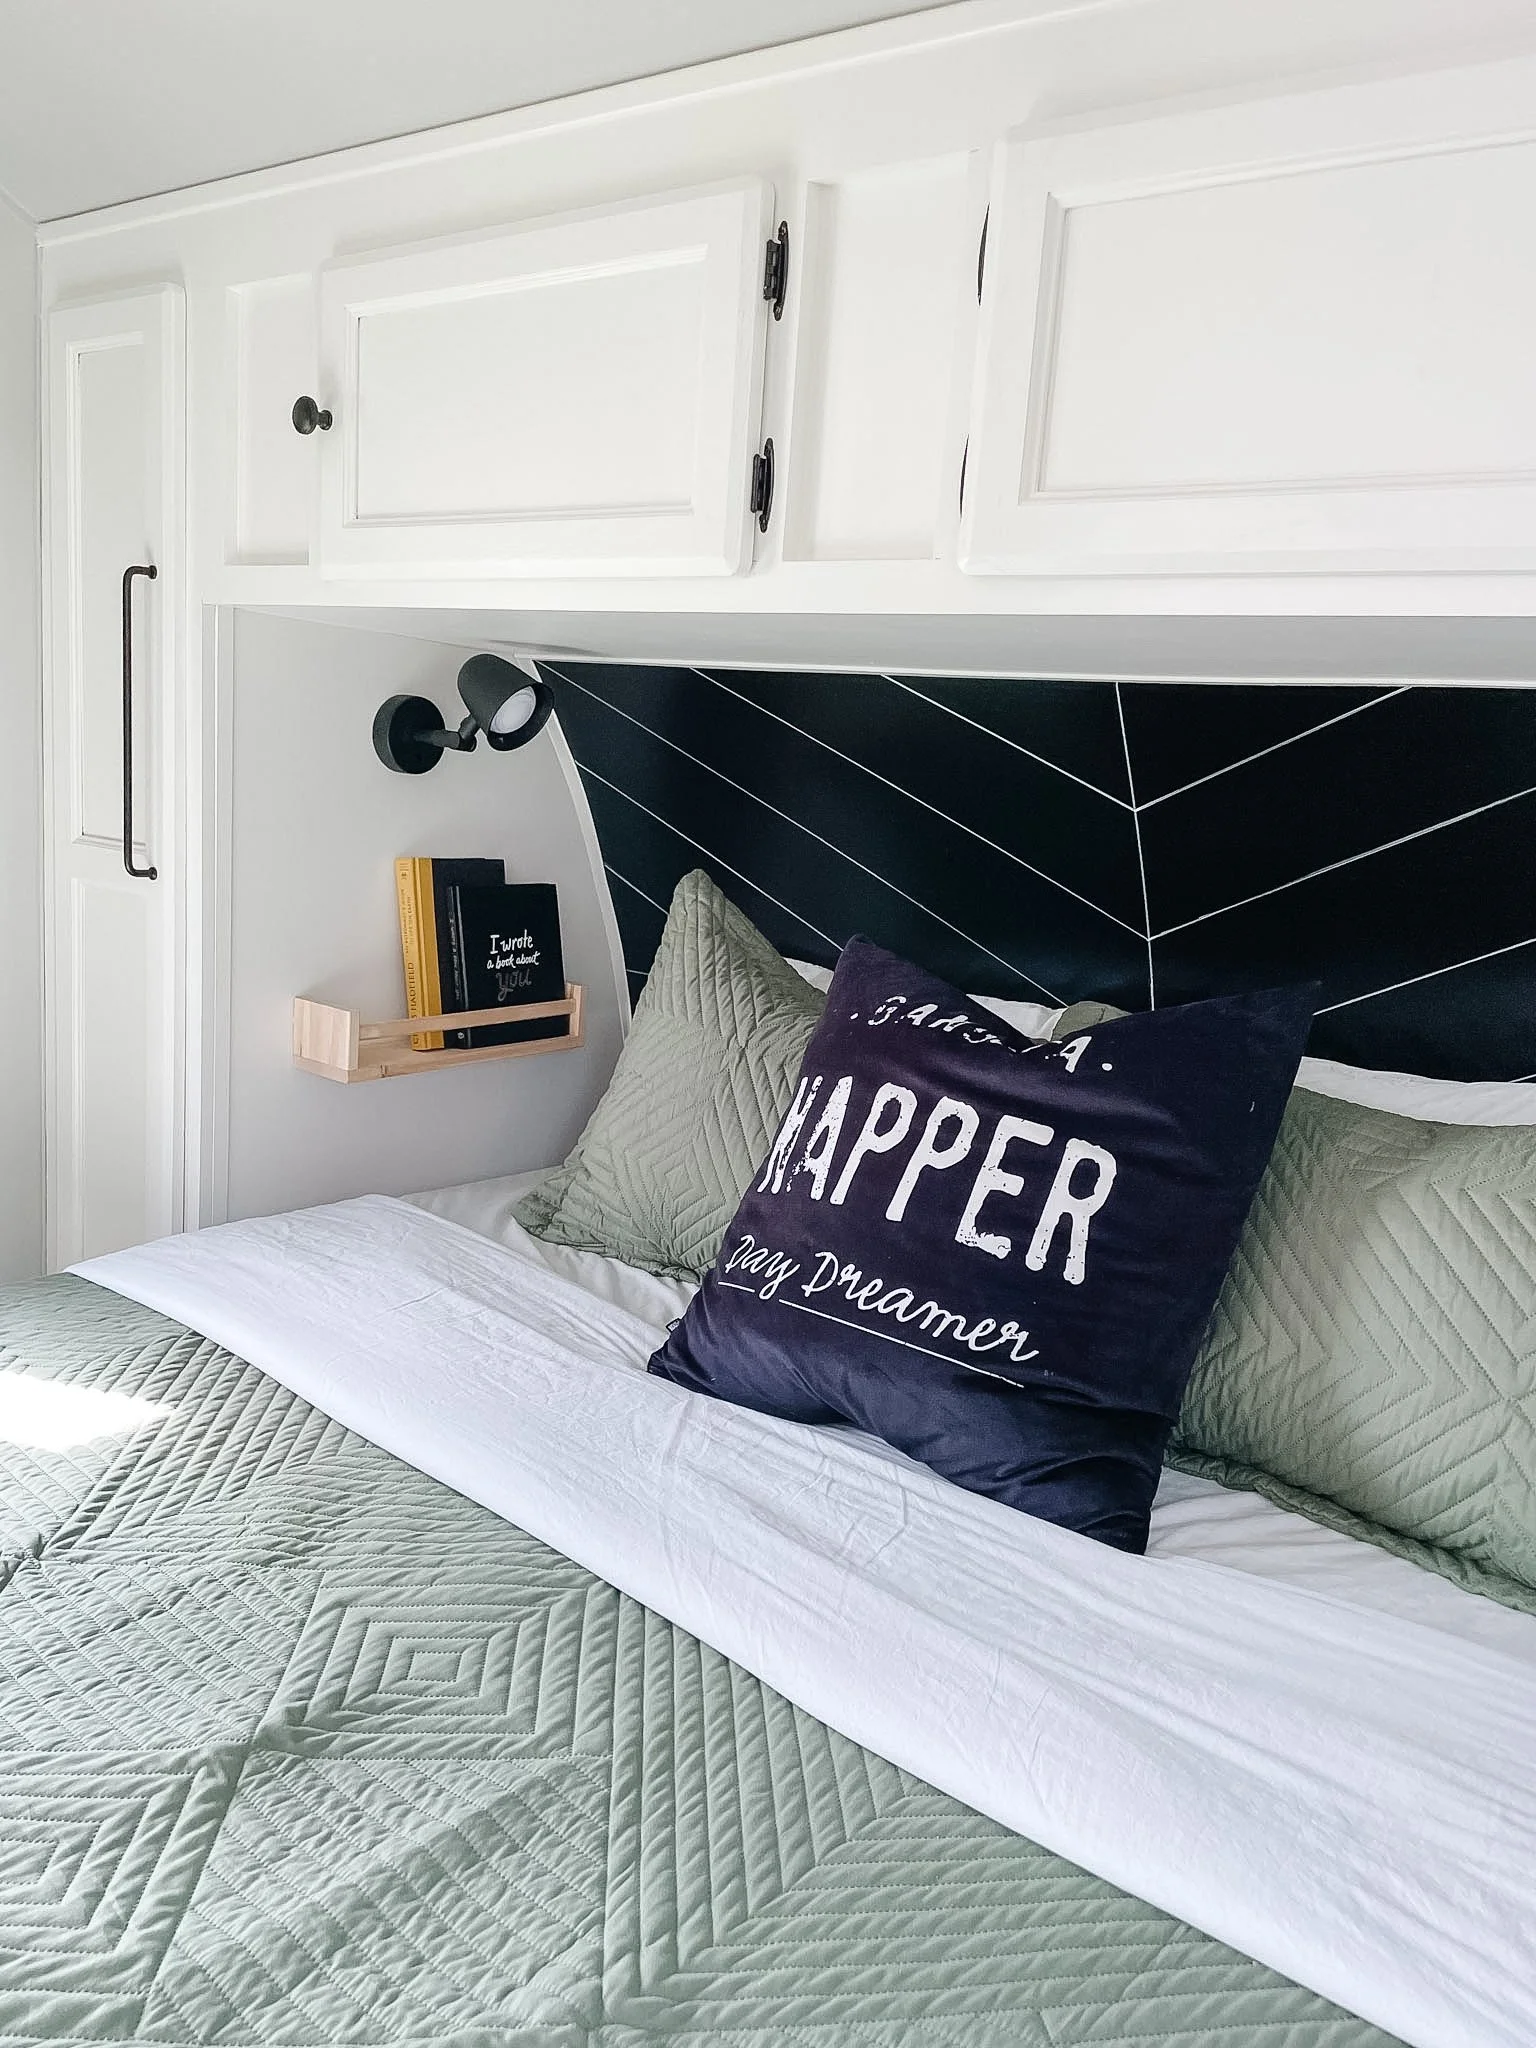
Create a Feature Wall
One of my favorite budget-friendly ideas was adding a simple painted design behind the bed.
Using a paint pen, I created clean diagonal lines on the headboard wall to add interest and personality.
It's inexpensive, customizable, and can easily be touched up if needed.
You don't need expensive wallpaper to make a statement. Here is the paint pen I used.
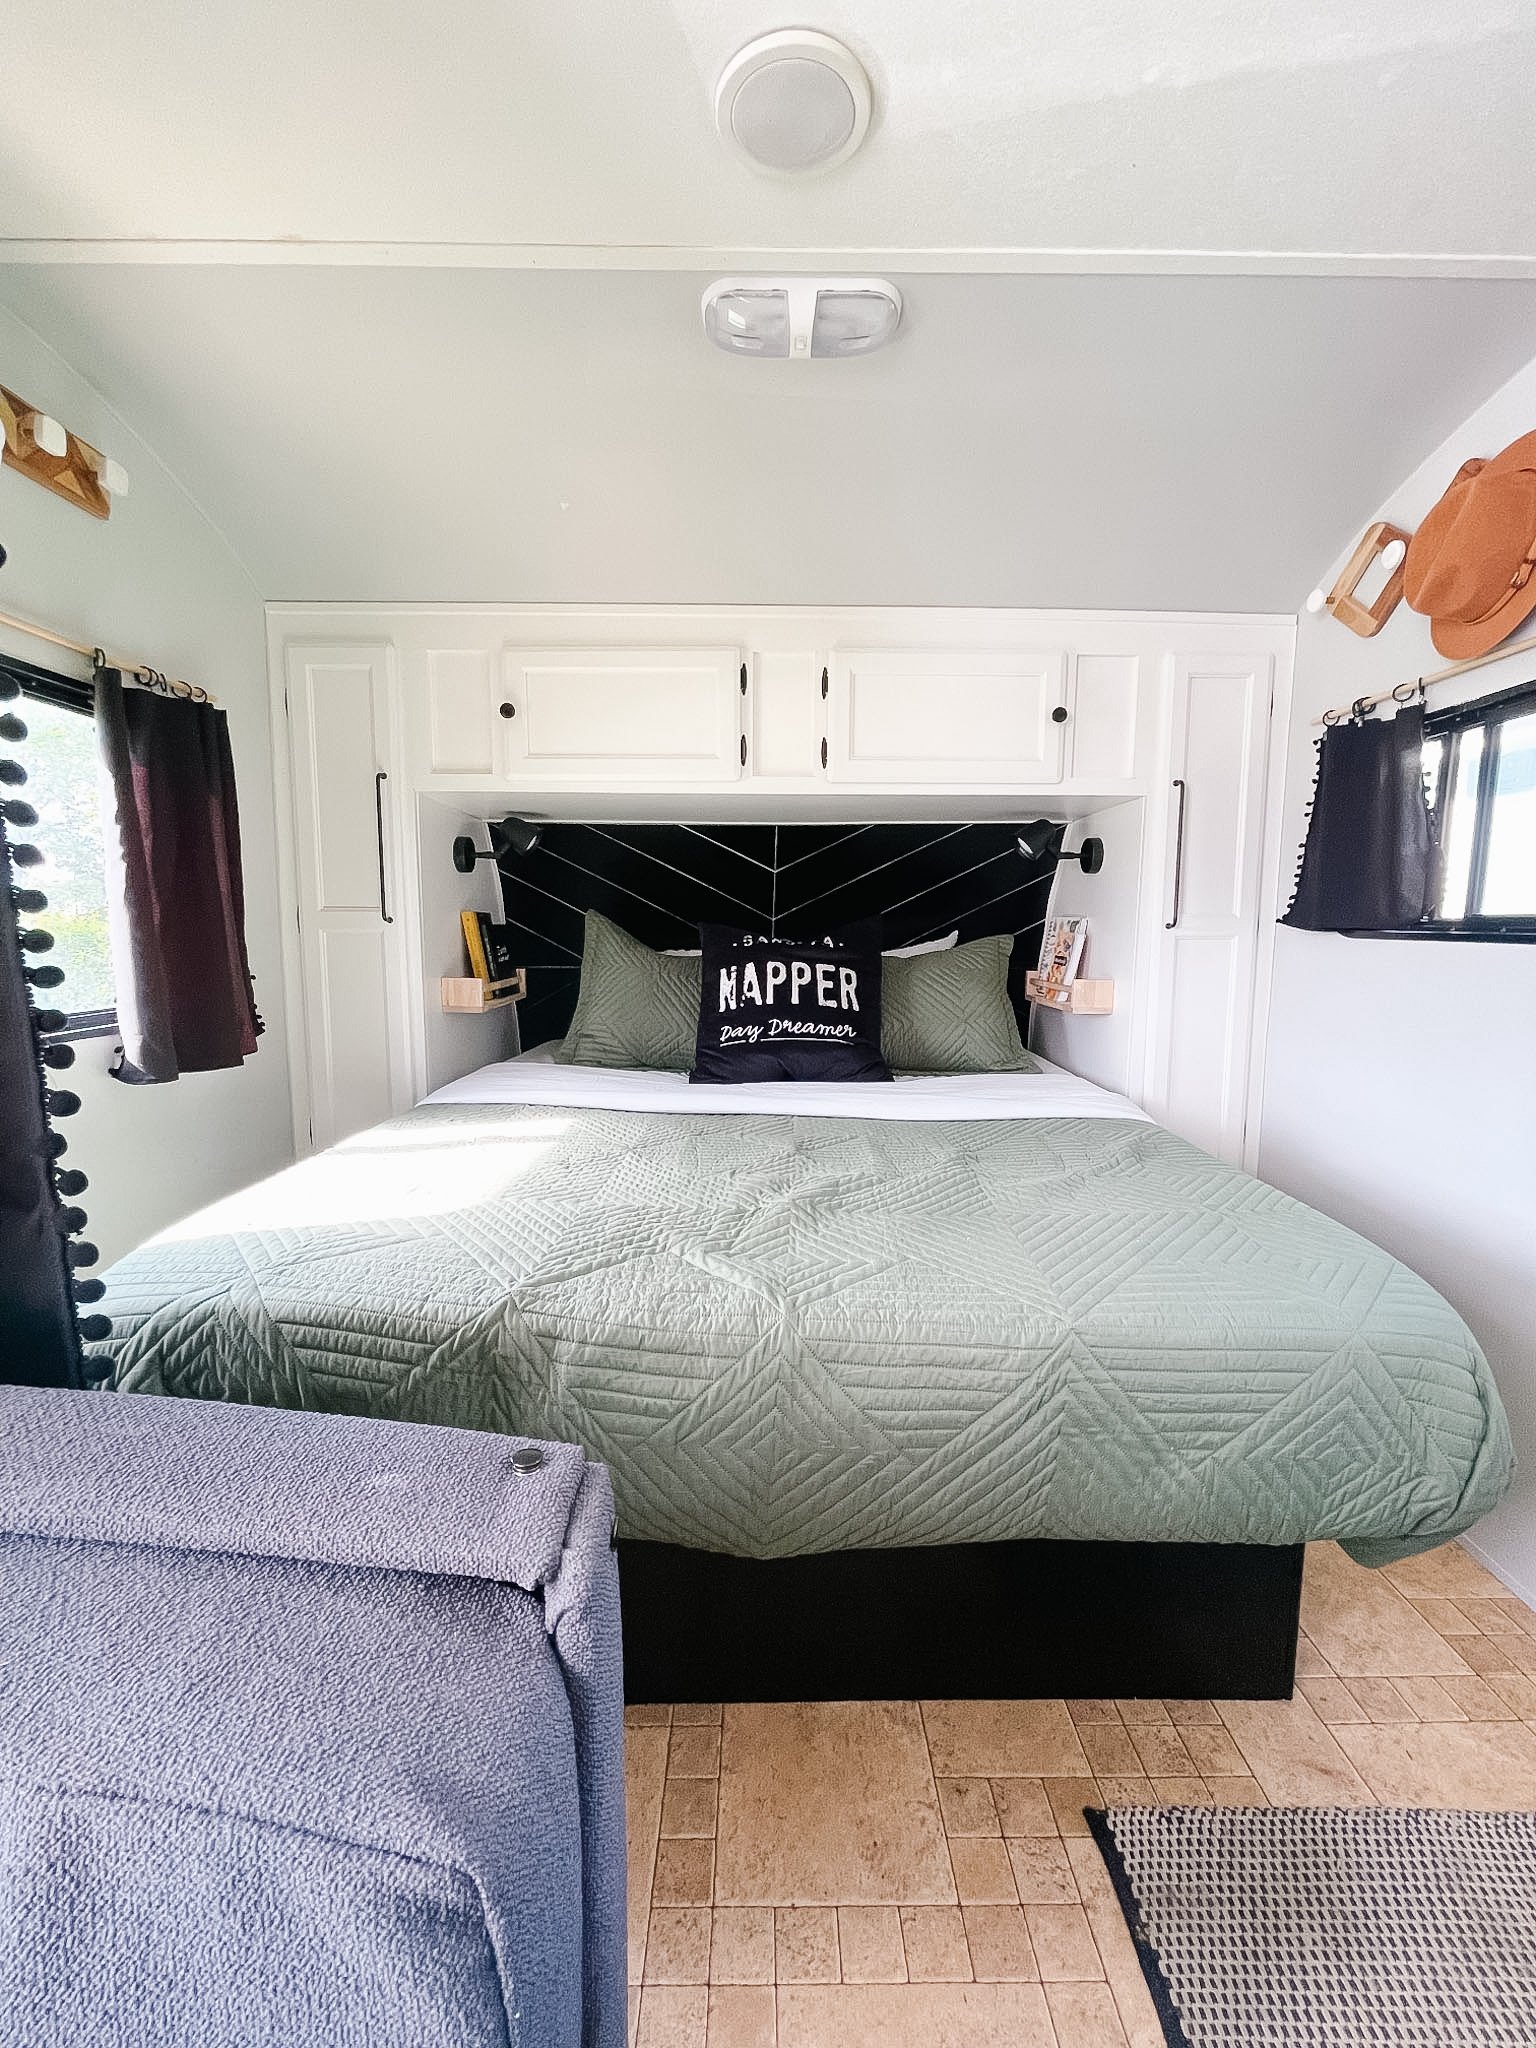

Add Cozy Layers
The difference between a camper and a retreat often comes down to textiles.
Some of my favorite additions included:
A textured green quilt
Accent pillows
A cozy blanket for campfires
Soft curtains
Layered rugs
These small touches made the camper feel welcoming and comfortable after a long day outdoors. Link to items I used to layer up my camper.


To shop items from this mood board for your own camper click on image

To shop items from this mood board for your own camper click on image
To shop items from this mood board for your own camper click image
Focus on Function, Not Perfection
One of the biggest lessons I learned during this renovation is that you don't need to do everything at once.
Choose the changes that will make the biggest impact on how you use the space.
Maybe that's adding more storage.
Maybe it's painting outdated cabinets.
Maybe it's simply replacing old curtains.
Small updates add up quickly.
A camper renovation doesn't have to mean demolition, replacing every surface, or spending a fortune.
By focusing on paint, storage, lighting, textiles, and a few thoughtful design details, you can create a camper that feels more functional, more personal, and more enjoyable for your family.
Our camper became one of our favorite places to relax, unplug, and make memories together—and the best part is that most of these updates were simple enough for anyone to tackle over a weekend.
Have you updated your camper recently? I'd love to hear what project made the biggest difference in your space.
Happy Camping!
Thanks for being here,
Shar